
https://www.instructables.com/Waterproofing-a-Capacitance-Soil-Moisture-Sensor/
Parts:
Tools:
Note: The most unusual item in this build is the large diam. heat shrink tubing with adhesive. Heat shrink is readily available from many suppliers. It's also on eBay, so you can buy your heat shrink when you buy your soil moisture sensors. Again, it must be adhesive-lined and have a 3:1 shrink ratio.


On rare occasions, we have found batches of these sensors that are flawed (we got a bad order from Ali Express). I would run a simple test of the sensors with an Arduino before waterproofing. There are many tutorials on the web - here is an example.

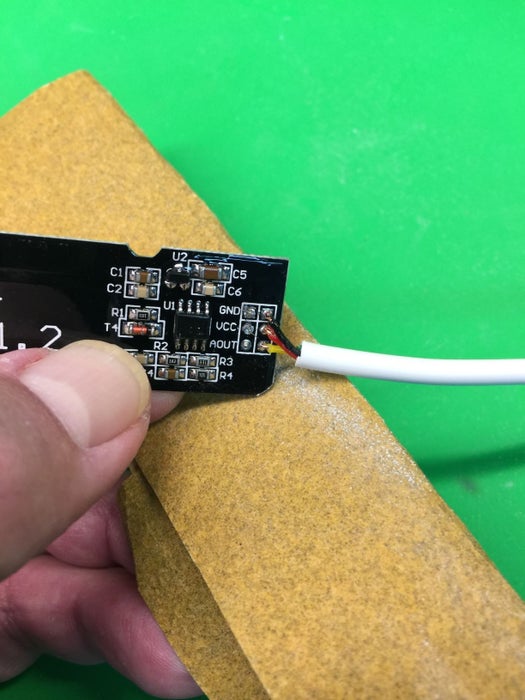
Remove the connector with a flush cutter. After the connector is removed, there will be three unused solder through-holes for attaching the signal wires (they cannot be seen until you remove the connector)


Prep signal wire and solder. Made sure to trim the wires on the back of the board flush with the PCB using your cutter. Clean the solder joint with rubbing alcohol.


Apply Sally Hansen's nail polish or a similar compound to exposed circuits on the front and back where the electronic components and traces are exposed. Do not apply to the whole sensor board, just the top inch or so with exposed electronics. Do this outdoors or in a well-ventilated room - allow 30 min to dry.
File the corners with sandpaper or a file. This prevents the sharp corner from piercing the heat shrink tubing

Cut three sectons of heat shrink tubing as follows.
1/4" diam. - 1.25 inches long
1/2" diam. - 0.75 inches long
3/4" diam. = 1.5 to 1.75 inches long (I used 1 5/8")

Apply the 1/4 diameter tubing with the heat gun - as always - BE VERY CAREFUL WITH THE HEAT GUN. Get adult supervision if needed.

Add the 1/2 tubing with the heat gun.


Last, apply the 3/4" diameter tubing. Make sure the adhesive is melted and seals all the joints. It's important that you get the tubing in the correct position or you won't get full coverage of the electronics. Using a gloved hand, you can apply pressure to the heat shrink while it's still warm to push the adhesive onto the PCB; this may improve the seal.

Apply a thin layer of nail polish at the sensor / tubing seam to provide extra waterproofing protection.

Test the probes again with your Arduino or other microcontroller. I submerged my sensors in a glass of water for several days while taking readings periodically to verify performance.