Kombucha recipes
Dairy kefir recipes
Water kefir recipes
Ginger Beer
https://www.fairment.de/wissen/ingwerbier-ginger-beer/
Ginger Bug
Tag 1: Gieße 200 ml Wasser in ein Glas. Füge 3 Esslöffel ungeschälten, in dünne Scheiben geschnittenen Ingwer und 3 Esslöffel Zucker hinzu.
Tag 2 und folgende: Füge täglich 1 Esslöffel Ingwer und 1 Esslöffel Zucker hinzu. Gut durchrühren und wieder mit dem Tuch und Gummiband verschließen.
Ginger Beer
15 g frischer Ingwer --> 50 g
900 ml Wasser
50 g Ginger Bug oder 4 EL --> 50 g
70 g Zucker --> 70 g
60 g Zitronen- oder Limettensaft --> 50 g
==> ginger bug topped up with 200 ml water and 15 g sugar
==> ginger beer fermented for 2.5 days in open container and for 0.5 d in closed plastic bottle ==> nice taste
2023-07-01
frischer Ingwer --> 125 g
Wasser: 2850 ml
Ginger Bug --> 150 g
Zucker --> 150 g
Zitronen- oder Limettensaft --> 75 g
==> ginger bug topped up with 150 ml water, 30 ml sugar and 30 g ginger; stored at RT for 2 d, then transferred into fridge
==> ginger beer fermented for 3 days in open container ==>
https://www.hofladen-bauernladen.info/in/leinfelden-echterdingen/418
https://www.reddit.com/r/Kombucha/
https://www.reddit.com/r/Kombucha/comments/jlkqpf/anyone_using_inulin/
Here's what a half gallon batch with 1/4 cup sugar and 1/4 cup Chicory Inulin with 12g Himalayan white tea looks after 5 days. The prior pelicle was a sinker, but the new one is nearly 1/4" thick already!
https://ec.europa.eu/food/safety/labelling_nutrition/claims/register/public/?event=search
live microorganisms which when administered in adequate amounts confer a health benefit to the host.
https://www.fairment.de/wissen/kombucha-wissen/kombucha-alkohol/
Kombucha Troubleshooting
Sollte die Starterflüssigkeit besonders trüb sein, ist das ein Indiz für eine Übervölkerung von Hefen. In einem solchen Fall hilft folgender Trick: Stelle den Starter im Kühlschrank kalt. Nach einiger Zeit bildet sich ein sichtbarer Bodensatz. Filstere den Starter dann durch einen feinen Filter (zum Beispiel einen Kaffeefilter) und lasse den Bodensatz zurück.
Dein SCOBY sollte vor jedem neuen Ansatz einmal lauwarm abgewaschen werden. Achte dabei darauf, die dunklen Hefereste vom Teepilz zu entfernen.
What are fermented foods and which are best for improving our gut health?
Traditionally many different cultures have used the process of fermentation to preserve foods.
In India lassi was a common pre-dinner drink, Asian cultures enjoy pickled fermentations of cabbage, turnips and eggplant, kefir originated in the northern Caucasus Mountains and sauerkraut is associated strongly with Germany. Other fermented foods include yoghurts, cheeses, sour dough bread and chutneys.
However, as well as lasting longer, fermented foods often contain a variety of ‘good’ bacteria which, if they can survive the journey to our gut, can be beneficial for our health.
In our big probiotics study, the group taking a fermented milk based drink called kefir saw significant changes in their gut bacteria – specifically a rise in a family of bacteria called Lactobacillales, which are known to maintain gut health.
We wanted to explore this further and find out which other fermented foods might be good options for improving our gut bacteria, so we gathered some of the most popular products and put them to the test.
We took 5 foods: a soft cheese, sauerkraut (preserved white cabbage), kimchi (traditional Korean fermented vegetables), kefir and kombucha (a fermented tea-based drink).
We gathered together homemade versions of these foods, made by volunteers from The Fermentarium, and we also bought readily available ‘off the shelf’ versions from supermarkets and shops. Once we had all of our samples, we sent them to the lab for testing.
Martha Villegas-Montes and a team at Roehampton University analysed our samples, looking for specific bacteria that we know to be good for our guts and Dr Paul Cotter from Teagasc Food Research Centre in Cork presented the results.
When we looked at the shop bought sauerkraut, kimchi and soft cheese we didn’t find any of the bacteria we were looking for. This is probably because these foods will have been pasteurised to make them safe and to improve their shelf life - both important factors in commercial food production. The downside however, is that these processes also kill off the ‘good’ bacteria that might be present.
Two of our shop-bought foods, the kefir and the kombucha, did contain levels of the bacteria. This suggests that both of these foods were made using traditional processes and were not pasteurised, meaning that the good bacteria survived.
In our homemade foods, which had all been produced using traditional methods, we found diverse strains of bacteria and higher levels, particularly of a type called Lactobacillus.
There are many different species and strains of Lactobacillus – some that have good health-giving properties that we know about, and some that don’t. But by eating a fermented food with lots of different varieties, like our homemade versions, there is a chance that some of the strains present will be good for you.
There’s still a lot of research that needs to be done into the world of our gut bacteria, but so far studies suggest that for general good gut health, a range of bacteria is best, so it would seem that traditionally made fermented foods - whether they be homemade versions or commercial varieties that are unpasteurised - are a good way to achieve this.
But there are important things to be aware of if you’re planning to produce your own homemade fermented foods. Just as homemade versions can contain greater numbers and varieties of beneficial bacteria, they can also contain harmful bacteria, particularly if they are not produced or stored correctly. So if you do want to make your own you should follow a recipe, use the correct equipment and store your foods at the correct temperature.
https://www.healthyfellow.com/754/antibiotics-and-kefir/
January 13, 2011 Written by JP [
]
You’ve probably been told by family, friends and possibly even a physician or two to eat yogurt to counteract some of the adverse effects of antibiotics. The justification is that probiotics in yogurt replenish many of the healthy bacteria that are wiped out by such medications. But there’s another fermented dairy product on the block that you might also want to consider. Kefir is a drinkable source of probiotics that generally contains a higher proportion and broader range of active cultures than yogurt. This reality forms a strong theoretical basis for considering kefir during and after any antibiotic regimen.

The December 2010 issue of the Journal of Medicinal Foods makes the case for using kefir alongside antibiotics. An antibiotic regimen known as “triple therapy” is commonly employed to eradicate H. pylori in infected patients. This harmful bacterium is associated with intestinal inflammation, stomach cancer and ulcers. A 14-day randomized, double-blind study examined the effects of combining kefir or a placebo (milk) with an antibiotic-based treatment (amoxicillin, clarithomycin and lansoprazole). The kefir and placebo were given at a dosage of 250 ml or about 8 ounces twice-daily. The participants returned for an examination after 45 days. Questionnaires and a urea breath test were used to assess side effects and treatment success. The patients receiving the kefir-enhanced therapy achieved significantly higher H. pylori eradication – 78.2% vs. 50% in the placebo group. What’s more, those given the probiotic beverage reported “less frequent and less severe” side effects. (1)
Another group of researchers from St. Luke’s Medical Center in Duluth, Minnesota successfully employed kefir in 8 patients with “recurrent episodes of Clostridium difficile-associated diarrhea”. Antibiotic therapy using oral metronidazole or vanomycin was combined with daily kefir consumption. The dosage of antibiotics was gradually reduced and ultimately withdrawn. According to the author of the paper, “All eight successfully resolved their infection and did not experience any further diarrhea after completion of treatment”. Clostridium difficile infection or CDI is a leading cause of hospital-acquired, intestinal disease. Its incidence is increasing and so too is the virulence. New strains of C. defficile are leading to “increasing morbidity and mortality” in vulnerable populations. This is all the more reason why safe and effective adjuncts such as kefir need to be considered and employed where indicated. (2,3,4)
“Designer” Probiotics Display Anti-Bacterial Potential
Source: Gut Pathogens 2010, 2:5 (link)
Kefir was the subject of a highly publicized trial that appeared in the August 2009 edition of the Archives of Pediatrics & Adolescent Medicine. The Georgetown University lead study examined the effects of a popular children’s kefir product on antibiotic-associated diarrhea (AAD). The trial itself was well designed and a most welcome opportunity for kefir to shine. Unfortunately, the findings didn’t reveal statistically significant benefits to kefir with live cultures vs. kefir containing heat-killed microbes. Future interventions using other products may help elucidate whether this finding is specific to kefir used here. Until then, I can tell you that the product in question (Probugs) contains a considerable amount of added sugar. The only type of kefir I recommend and use is the traditional, no-sugar added variety. (5)
Before combining kefir or yogurt with antibiotics, please be aware of the potential for adverse interactions. Many people express worry that taking probiotics in close proximity to antibiotics will nullify the benefits of the probiotics. This is a reasonable concern. However, there’s an even more pressing matter at hand. Dairy products contain a protein known as casein which may negatively affect the activity of select antibiotics. That’s why it’s important to inquire with your pharmacist and/or physician prior to selecting a probiotic food. One can often avoid such problems by consuming dairy a few hours apart from antibiotics or even selecting non-dairy sources of probiotics such as coconut milk kefir. That is also a good strategy to help keep the antibiotics from negating the benefits of the probiotics. (6,7,8)
Note: Please check out the “Comments & Updates” section of this blog – at the bottom of the page. You can find the latest research about this topic there!
Be well!
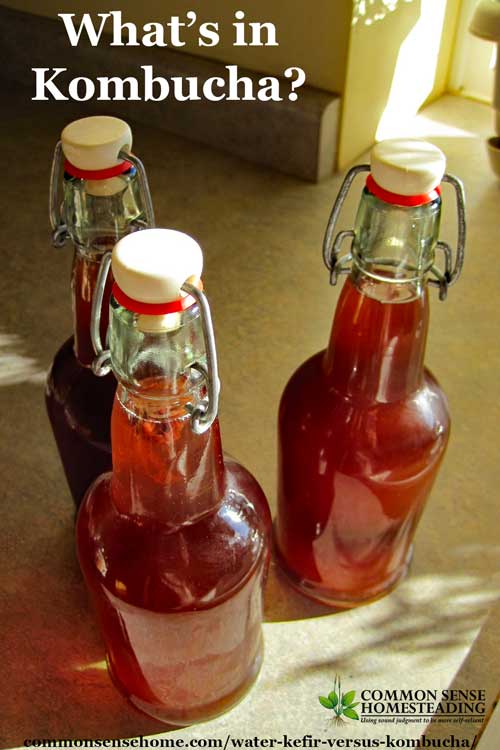
https://commonsensehome.com/water-kefir-versus-kombucha/

ByLaurie NevermanMarch 4, 2017
12054SHARES

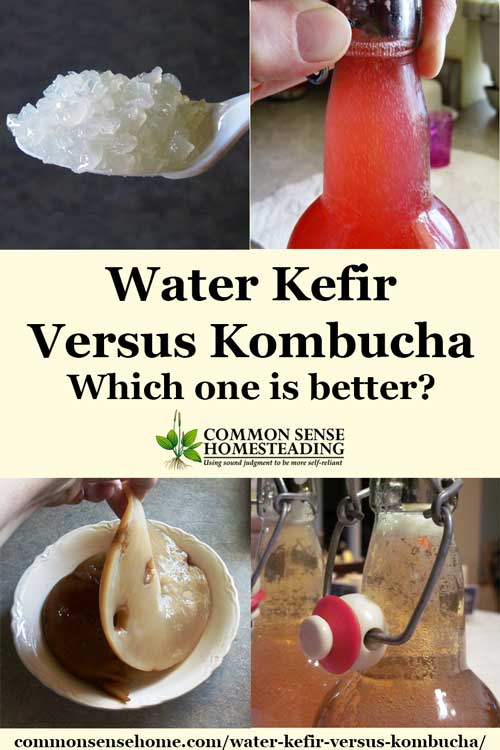
This is a question I've heard a number of times. My kids like the flavor of water kefir soda better than kombucha tea, but I generally prefer the kombucha myself, and my husband will drink either, depending on the flavor.
Water kefir is quicker to brew than kombucha tea – unless you do a continuous ferment, in which case you can draw off kombucha every day. Some people find water kefir is more consistent, my kombucha tends to be more consistent. Some people feel guilty about excess scobys, I have been able to give most of mine away, or I simply compost them. A few I've used to treat skin ailments, such as my son's cradle cap. (Read The SCOBY Cure.) (DON'T FLUSH YOUR SCOBY! It may just be able to grow in your septic system and cause big problems.)
So, other than personal preference, what is the real difference between water kefir and kombucha? Both start with a base of sweetened liquid (kombucha with sweetened tea, water kefir with sweetened water). I did a lot of hunting, and what follows are some of the best explanations I found on the Net. First up, kombucha.
Kombucha is also known as Kombuchal, Gerbstoffe, Combucha, Kum-Cha, Fungus japonicas, Fungojapon, Indo-Japanese tea fungus, Pichia fermentans, Cembuya orientalis, Combuchu, Tschambucco, Volga spring, Mo-Gu, Champignon de longue vie, Tea Kvas, Teakwass, Kwassan, Kargasok, Kocha kinoko, Tibetian mushroom and more.
From the forums at Wild Fermentation:
The bacterial component of a kombucha culture usually consists of several species, but will almost always contain Gluconacetobacter xylinus, which ferments the alcohols produced by the yeast(s) into acetic acid. This increases the acidity while limiting the alcoholic content of kombucha. G. xylinum is responsible for most or all of the physical structure of a kombucha mother, and has been shown to produce microbial cellulose.
From the Happy Herbalist (which I highly recommend – tons of great information):
The classification of kombucha vinegar according to Traditional Chinese Medicine is Sour, Bitter and Warm, and milder than alcohol which is Hot (alcohol contributes to phlegm and stagnation). TCM uses vinegar (kombucha) to break stagnation and to move the blood and Qi. Thus improving circulation and contributing to the general feeling of well-being.
As a Pro-biotic: Acidic kombucha, pH 2-3.5 aids the Stomach (both in the TCM and western sense) in the breakdown and digestion of food ingested. Beneficial bacteria and yeasts, that comprise the Live K-T or Pressed Extract (as opposed to pasteurized, neutralized, alcoholic or dead kombucha) compete with and help remove (suppress) harmful bacteria, yeast, parasites. … Then due to the synergism of the stomach acids and kombucha (Acid and Alkaline meets Yin and Yang, Herman Aihara ISBN 0-918860-44-x), kombucha transforms into an alkaline forming substance. Now the transformed Alkaline kombucha pH 7+, aids the Spleen (function in TCM), intestines, gall bladder and pancreas (function in western speak) in metabolizing and distributing that digest throughout the body. Thus IMHO, kombucha truly holistically balances and harmonizes the body.
And finally, from the Heal Thyself Forums:
Kombucha also has the effect of increasing detoxification in the liver. This is beneficial, unless pregnant or nursing, or excess mercury stores. You also need your detox pathways to be open first for effective detox.
So, kombucha acts as an immediate digestive tonic, much like apple cider vinegar. It colonizes the guts with friendly bacteria and yeasts. It detoxifies the liver, and generally cleans and rejuvenates the digestive system as a whole.
The Happy Herbalist contains links to a number of kombucha studies at http://www.happyherbalist.com/analysis_of_kombucha.htm. On this page, they state that the typical composition of kombucha may include:
Bacterium gluconicum
Bacterium xylinum
Acetobacter xylinum
Acetobacter xylinoides
Acetobacter Ketogenum
Saccharomycodes ludwigii
Saccharomycodes apiculatus
Schizosaccharomyces pombe
Zygosaccharomyes
Saccharomyces cerevisiae
Acetic acid
Acetoacetic acid
Benzoic acid
propenyl ester
Benzonitrile
Butanoic acid
Caffeine
Citric acid
Cyanocobalamin
Decanoic acid
Ethyl Acetate
Fructose
d-Gluconic acid
Glucose
Hexanoic acid
Itaconic acid
2-Keto-gluconic acid
5-Keto-gluconic acid
2-Keto-3-deoxy-gluconic Lactic acid
Niacinamide
Nicotinic acid
Pantothenic acid
Phenethyl Alcohol
Phenol, 4-ethyl
6-Phospho gluconate
Propionic acid
Octanoic acid
Oxalic acid
Riboflavin
d-Saccharic acid
(Glucaric acid)
Succinic acid
Thiamin
plus 40 other acid esters in trace amounts.
Cultures for Health highlights key kombucha elements in their Q &A section:
Not all kombucha cultures will contain the exact same strains, but generally, these are some that you might expect:
Acetobacter: This is an aerobic (requiring oxygen) bacteria strain that produces acetic acid and gluconic acid. It is always found in kombucha. Acetobacter strains also build the scoby mushroom. Acetobacter xylinoides and acetobacter ketogenum are two strains that you might find in kombucha.
Saccharomyces: This includes a number of yeast strains that produce alcohol, and are the most common types of yeast found in kombucha. They can be aerobic or anaerobic (requires an oxygen-free environment). They include Saccharomycodes ludwigii, Saccharomycodes apiculatus, Schizosaccharomyces pombe, Zygosaccharomyes, and Saccharomyces cerevisiae.
Brettanomyces: Another type of yeast strain, either aerobic or anaerobic, that are commonly found in kombucha and produce alcohol or acetic acid.
Lactobacillus: A type of aerobic bacteria that is sometimes, but not always, found in kombucha. It produces lactic acid and slime.
Pediococcus: These anaerobic bacteria produce lactic acid and slime. They are sometimes, but not always, found in kombucha.
Gluconacetobacter kombuchae is an anaerobic bacteria that is unique to kombucha. It feeds on nitrogen that is found in tea, and produces acetic acid and gluconic acid as well as building the scoby mushroom.
Zygosaccharomyces kombuchaensis is a yeast strain that is unique to kombucha. It produces alcohol and carbonation as well as contributing to the mushroom body.
Kombucha also contains a variety of other nutrients, particularly various acids and esters that give the drink its characteristic tang and fizz. Included in these components is gluconic acid, which is the primary difference between the makeup of kombucha and the makeup of apple cider vinegar!

Now, water kefir:
Water Kefir is also known as Japanese Water Crystals, sugary-kefir grain (SKG), Sugary Fungus, Tibicos, Ginger Beer Plant, California Bees, Water Kefir Grains, tibetan mushroom grains, snow lotus, water crystals, tibi, Kephir, Paris, Kephir, kefir fungus, kefir d'aqua, and more.
(Water kefir) is loaded with valuable enzymes, easily digestible sugars, beneficial acids, vitamins and minerals. Water kefir is also generally suitable for some diabetics (though personal discretion is advised). It also is a nice option if you are trying to avoid the caffeine present in kombucha, but still seeking a probiotic drink. Water kefir supplies your body with billions of healthy bacteria and yeast strains. Some store-bought probiotic foods or supplements can help, but they are not as potent, and do not contain the beneficial yeasts usually (just bacteria).
Within your body there are already billions of bacteria and yeast. Your internal microflora support proper digestion, synthesis of vitamins and minerals, and your immune system by warding off foreign and harmful bacteria, yeast and viruses. It has thus long been known to promote and aid in digestion and overall health. Some studies show it may be anti-mutagenic and help manage free radicals in the body. Folic acid (and B vitamins) increases as the length of the ferment increases. Some people let the strained kefir sit on the counter or the fridge another day to increase the folic acid and B vitamin content before drinking (this will increase the acidity too).
Kefir may also help reduce blood pressure and cholesterol. As with most things we've personally found, food and health is too difficult to reduce to facts and statistics. While kefir is not a magic bullet for health (what is) we believe kefir has a myriad of possible health benefits, and those will be individual for everyone. Some feel it helps them digest better, others get colds and viruses less often, some get more energy, and some people feel nothing much in particular, but enjoy the taste and value of it over store-bought yogurt, kombucha or kefir.
Pat at Heal Thyself includes more information and a word of caution (she leans to the kefir side of the discussion):
Kombucha has Saccharomyces boulardii which displaces and replaces candida albicans in the gut. Candida binds mercury to keep it out of circulation. When you kill off candida in the gut, stored mercury is released back into circulation to redeposit into other organs and the brain.
Kefir does not do this similarly. Some people get GI symptoms if they start kefir too much too fast due to the microbial shift in the gut. Kefir has many beneficial microbials. You only need 1 tablespoon to equate to a whole bottle of probiotics.
So, water kefir is loaded with probiotics that colonize the entire digestive tract, doesn't contain caffeine (although if you use continuous brewing, caffeine in kombucha can be significantly reduced), may help with free radicals and boost the immune system. It doesn't produce a significant detox effect.
So what do you find in a typical glass of water kefir or kombucha?
Cultures for Health lists the following bacteria and yeasts as potentially occurring in water kefir:
Bacteria
Species Lactobacillus
L. acidophilus
L. alactosus
L. brevis
L. bulgaricus
L. casei subsp. casei
L. casei subsp. pseudoplantarum
L. casei subsp. rhamnosus
L. casei subsp. tolerans
L. coryneformis subsp. torquens
L. fructosus
L. hilgardii
L. homohiochi
L. plantarum
L. psuedoplantarum
L. reuterietc
L. yamanashiensis
Species Streptococcus
S. agalactiae
Sr. bovis
S. cremeris
S. faecalis
S. lactis
S. mutans
S. pneumoniae
S. pyogenes
S. salivarius
S. sanguinis
S. suis
S. viridans
Species Pediococcus
P. damnosus
Species Leuconostoc
L. mesenteroides
Species Bacillus
B. subtilis
B. graveolus
Yeast
Species Saccharomyces
S. bayanus
S. boullardii
S. cerevisiae
S. florentinus
S. pretoriensis
S. uvarum
Species Kloeckera
K. apiculata
Species Hansenula
H. yalbensis
Species Candida
C. gueretana
C. lamica
C. valida
Species Torulopsis
T. insconspicna
Basically, when you compare water kefir versus kombucha, it seems to me that water kefir acts primarily as a wide spectrum probiotic, whereas kombucha acts as a digestive aid, a probiotic and detoxifier.
I think both are valuable, but if I only had to choose one I would probably stick to kombucha. Both of them simply help your body to do what it needs to do – they are not miracle cures. Some sites warn not to use both, so keep that in mind. It's best to start with small doses until you body acclimates to the new inhabitants. I think it gets down to individual taste preference, and individual body chemistry. I encourage you to try both if you have the opportunity and see which works better for you.
Note: If you are dealing with candida overgrowth, note that ferments may contain candida species. Ferments may make some sensitive individuals worse, and some individuals better. Pay attention to how your body responds and adjust accordingly. Please check with your healthcare provider if you are on prescription medications, as fermented foods may affect how your medication is absorbed.
https://de.b-ok.cc/book/976543/8cb8c2
https://de.b-ok.cc/book/2665736/6adabf------
https://de.b-ok.cc/book/2289559/7f0ceb
https://de.b-ok.cc/book/2872043/29a4bc
https://de.b-ok.cc/book/2644955/60539c
https://de.b-ok.cc/book/2456392/ad8ee3
The Prepper’s Canning & Preserving Bible (5 in 1) | Tyler Gordon | download (b-ok.cc)
Kombucha shop
phases
first, only pre-defined flavors sold in a small shop; production facilities should not be visible to avoid quick arisal of competitors
then, choice of ingredients; possible to define concentrations
introduction of sensors
introduction of lab equipment for automatic testing of sugar and alcohol level, as well as pH
introduction of GUI for interactive tracking of state of fermentation; do not provide observables to customer but another scale, such as sour/medium/sweet, in order to avoid fast followers
finally, own ingredients can be provided
concept can be extended to other fermented beverages: spirits, kefir, etc.
best locations might be close to universities
own organic produces can be converted to more noble products with higher margin
energy consumption should be covered mostly by PV; rented place should allow mounting of PV; alternatively, production facility in the beginning in a village; might be only important for first fermentation
need to consider required permits for selling beverages containing alcohol
in the beginning, no large profits to be expected; important to expand as quickly as possible to avoid settling of competitors
crucial to be price competitive to supermarket products
it might be wise to consider keeping regular jobs as a safety net; need to hire employees, e.g. aunties
consider offering merchandise produced by family
consuder student discounts
consider subscription model
long-term target is to increase profit by optimizing supply chain
consider supplier agreements with restaurants
consider local delivery; long journeys not recommended without expensive measures
need to ask for subsidies; better to keep quite on Kombucha activities ans tell people that it’s going to be a fruit bar with locall produced fruits
need to create charts to show predicted number of locations, emploees, etc.
need to define criteria to pass from one phase into the next, such as revenue/etc.
It is forbidden to use vessels/containers from outside to avoid contamination
Kombucha hotel must be in another location as a backup
need to clarify liability in case of consumption b an allergic person
hygiene is crucial
need method to identif leaking glasses: vacuum chamber to measure leakage rate
consider offering bubble tea with fruit pearls made from own produces
need to test qualit of different bottles; ideall, onl bottles for multiple use will be provided
the price should be affordable; need to compare to similar trendy drinks; price should be comparable to Cola
https://www.karekod.org/blog/icecek-fiyatlari-2022/, 2022-11-15
Coca Cola, yedigün, pepsi, lipton, fusetea: 15 YTL
Ayran:17 YTL
uludag: 10 YTL
https://fastfoodfiyatlari.com/pinar-su-fiyatlari/
erikli su, 19 l:
https://haberglobal.com.tr/ekonomi/damacana-su-fiyatlari-2022-ne-kadar-19-lt-su-fiyati-159552
19 l: 25 YTL
offer a fast option that uses higher temperature for 2F
need to consider redundancy for heating elements to avoid spoiled batches and minimize safety risks
set up a camera system to obtain time lapse videos to track growth of scoby and circulation of liquid
continuous scouting required to come up with new flavors; check reddit and commercial producers of kombucha
subscription based model with free choice of flavors
need to have a concrete plan to scale up production quickly by factor of two if current capacity is exceeded
in the beginning it might be required to obtain publicity by opening store in area frequented by a lot of students
need to decide whether each bottle should have unique ID or QR codes tags can be transferred between bottles; advantage could be that history of bottles is logged; however, need to consider that QR code might be illegible
water filters; ideally visible by customers
Philips X-Guard AWP3703 & AWP3704 with AWP305: 10 € per 1000 l
BRITA P1000: 50 € per 500 l
Quality control to be set up
offer seasonal drinks
consider big data analysis to identify most popular drinks
seasonal fluctuations?
Small intented variations: correlate with customer feedback or sales number
consider performing systematic DoE with logging of temperature, pH, alcohol and sugar content
provide option for filtered or unfiltered boocha; meant to remove the strains of yeast; filtering should be charged due to usage of a second bottle; Weck bottle should be used before filtering due to ease of cleaning
cleaning procedure must be meticulously documented
use of safety glasses is compulsory; burping/venting of bubbles should be food practice before passing bottles to customer
need safety SOPs; especially for broken glass, cleaning, etc.
need air filtration system to avoid complains by customers and neighbors
cleaning of bottles solely with hot water, steel beads and white vinegar
estimation of number of customers for on-site sale; online sale not considered
https://www.linkedin.com/pulse/retail-story-how-passerby-becomes-customer-benjamin-zenou
5% of passers-by enter store
25% of visitors actually buy something
assuming 0,5 l sold per person
→ 100 customers, 400 visitors, 8000 passers-by
estimation of electricity cost
15 W heating mat per 10 l in a well-insulated thermobox, 500 l heated at each time → 750 W
PC, server run 24/7: 500 W
fridge and freezer: 20-50 W per unit, 100 l per unit → maximum 5 units → 500 W
→ energy consumption per year: 15330 kWh
assuming 30 ct/kWh → 4599 € per year → 383 € per month
==> it might make more sense to carry out first fermentation at a location with low energy cost and availability of photovoltaic systems
strategy could be to invest in modular PV first on existing building; only after customer threshold exceeded, battery should be considered; also possible to turn off heater at night
cost estimation; premise: 50 l sold per day, 1500 l per month
minimum profit margin: 10%
expected sales price: 1 €
full-time labour: 250 €
tea, filtered water (0,1 € per l), sugar: 250 €
juices (0,5 € per l, 10%): 75 €
rent: 200 €
electricity: 400 €
marketing: 50 €
electronics: 50 €
miscellaneous: 50 €
initial investment: 5000 €
heating elements
vessels, bottles, jars
thermoboxes
shelves
computer
water filter
decoration, lamps, signs
dish washer; no soap allowed!!!
in long-term, vegetarian food can be put on the menu: falafel, etc.
https://www.ikegger.com/products/20l-keg-fermenter-in-one-fermenter-king-junior
Bormioli Rocco
Bormioli Flasche Swing 0,50 ltr.
https://www.metro.de/marktplatz/product/8713a587-cbaa-4a32-97af-c5f06a2dfa1f
https://www.metro.de/marktplatz/product/9d37e0ff-4101-4817-ae30-d544a7396ac8
WAS Germany – Bügelverschlussflasche
https://www.metro.de/marktplatz/product/a2e144fb-26ad-4d26-9dba-cad8994e24a8
BigDean 12x Glasflaschen mit Bügelverschluss 500ml
Bügelflasche 500 ml Typ B
https://www.glaeserundflaschen.de/buegelflasche-500-ml-typ-b
Gärkappe Größe 5
https://www.glaeserundflaschen.de/gaerkappe-groesse-5
Gärröhrchen aus Glas, Ø 10 mm
https://www.glaeserundflaschen.de/gaerroehrchen-aus-glas-oe-10-mm
Plaato - Digitaler Gärspund + WiFi
Getränkefiltration
https://de.wikipedia.org/wiki/Getr%C3%A4nkefiltration
https://de.wikipedia.org/wiki/Schichtenfiltration
https://brouwland.com/de/1076-schichtenfilter?q=Segment-Bier
https://brewbuch.com/how-to-make-kombucha/
https://www.stonefryingpans.com/best-kombucha-flavors/
https://brewbuch.com/top-kombucha-flavors/

https://www.fairment.de/wissen/kombucha-wissen/kombucha-selber-machen/#
Kombucha Rezept
Zutaten
1 Kombucha Bio-Teepilz
200 ml Ansatzflüssigkeit
12 g Tee
100 g Zucker
1,3 L Wasser
Anleitungen
Bringe 300 ml Wasser zum Kochen. Wir empfehlen (bestenfalls gefiltertes) Leitungswasser oder Mineralwasser ohne Kohlensäure.
Lasse nun die gesamte Menge Tee im heißen Wasser 8-10 Minuten ziehen. Anschließend entferne den losen Tee. Am besten geht das mit einem Teesieb oder einer Teesocke.
Gib jetzt die gesamte Menge Rohrohrzucker in den noch heißen Tee und rühre so lange, bis sich der Zucker vollständig aufgelöst hat.
Als nächstes gibst du den süßen Tee und das Wasser in das Fermentationsgefäß. Dabei kühlt der vorher gebraute, süße Tee schnell ab.
Dieser Punkt ist besonders wichtig, denn die Kombuchakultur verträgt keine heißen Temperaturen. Das würde sie töten, sie ist schließlich lebendig!
Nun die Starterflüssigkeit und der Teepilz in den süßen Tee hinzugegeben.
Nicht wundern, manchmal sinkt der Pilz auf den Grund, manchmal schwimmt er oben. Beides ist vollkommen richtig und kein Grund zur Sorge.
Decke die Öffnung des Gärgefäßes mit einem Geschirrtuch oder Küchenpapier ab. Das schützt deinen Kombucha vor Essigfliegen und anderem Ungeziefer. Solltest du unser Set bestellt haben, liegt eine passende Abdeckung für das Gärgefäß bei.
Jetzt stellst du dein Gärgefäß an einen warmen, ruhigen Ort. Wichtig für den Kombucha ist eine Raumtemperatur über 19 °C, ein wenig frische Luft und im besten Fall ein dunkler Ort. Eine zu grelle Beleuchtung kann der Kultur schaden.
Nach 5 Tagen testest du, ob dir der Kombucha schon sauer genug ist. Ist dies der Fall entnimmst du den Teepilz und legst ihn fürs Erste beiseite, um deinen fertigen Kombucha abzufüllen.
Ist dir dein Kombucha noch nicht sauer genug, lässt du den Kombucha weiter fermentieren.
Als letzten Schritt füllst du ca. 80 % deines fertigen Kombuchas in Flaschen und verschließt diese luftdicht. Für mehr Kohlensäure lässt du deine Flaschen ca. 1-3 Tage bei Raumtemperatur stehen (Zweitfermentation).
Dann stellst du die Flaschen erst mal kalt. Kalt hält sich dein Kombucha sehr lange und schmeckt noch besser.
Ca. 10-20% des Kombuchas verbleiben nun als neue Starterflüssigkeit für den nächsten Ansatz im Glas. Jetzt kannst du wieder bei Schritt 1 beginnen.
Notizen
TIPP: Je saurer der Kombucha wird, desto weniger Kombucha wird das nächste Mal als Ansatzflüssigkeit gebraucht. Wenn du eine längere Kombucha Pause brauchst, kannst du deinen Teepilz im SCOBY-Hotel in den Urlaub schicken.
Kombucha selber machen – Unsere Top 6 Tipps für besseren Kombucha
Decke das Gefäß richtig ab: Nutze kein zu grobmaschiges Material. Geschirrtücher sind klasse und auch Küchenrolle. Nutze unbedingt ein Gummi, um das Tuch oder das Papier zu fixieren. Sonst krabbeln die Gärfliegen einfach von unten in das Gefäß.
Braue mehr Kombucha mit den richtigen Gefäßen: Nutze größere Gefäße. Behalte aber das Verhältnis wie im Rezept angegeben einfach bei. Beachte auch, dass größere Mengen Kombucha auch mal länger dauern können.
Eine Ruhepause für deinen SCOBY: Du fährst in den Urlaub? Der SCOBY kann sich wunderbar einige Wochen in normalem Kombucha halten. Der wird dir zwar nicht mehr schmecken, weil er zu essighaltig wird, aber deinem SCOBY geht es gut. Verschließe das Gefäß am besten richtig, wenn du den Fermentationsprozess stoppen willst. Ohne Sauerstoff ruht dein SCOBY. Hier findest du mehr Informationen zum SCOBY-Hotel.
Probiere andere Tee-Optionen aus: Du kannst nicht nur mit Schwarztee arbeiten. Auch, wenn dein Teepilz diesen Tee liebt. Von echtem Tee kannst du auch grünen Tee, weißen Tee, Oolong oder Pu-Erh wählen. Aber auch Kräutertees wie Hibiskus funktionieren. Es sollte immer ein Großteil echter Tee sein (also von der Teepflanze), da die enthaltenen Stickstoffe, die Nährstoffe für deinen SCOBY bilden. Lass die Finger von zu öligen Tees oder Tees mit künstlichen Aromen. In diesem Artikel „Was ist der beste Tee“ gehen wir auf die verschiedenen Teesorten ein.
Der richtige Aufbewahrungsort: Bewahre deine Gefäße unbedingt außerhalb der direkten Sonneneinstrahlung auf. Also keine Fensterbank – die guten Bakterien mögen es dunkel und warm!
Sei vorsichtig mit deinem SCOBY: Vermeide Kontakt zu Metall. Er färbt sich nicht nur geschmacklich ab, sondern reagiert mit deinem SCOBY und schadet ihm. Eine Ausnahme ist rostfreier Edelstahl.
Lese fleißig unsere Artikel, auf unserer Internetseite findest du viele Informationen rund um das Thema „Kombucha selber machen“ und werde zum Kombucha-Meister-Brauer.
https://www.fairment.de/wissen/kombucha-wissen/kombucha-meister-brauer/
Werde Kombucha-Meister-Brauer – 8 wichtige Fakten auf dem Weg dahin!
1. Schimmel auf dem Scoby?
Kombucha brauen, scoby
Die häufigste Frage von Hobby-Brauern hat mit Schimmel zu tun. Wer will schon, dass sein Scoby schimmelt?
Die gute Nachricht: Schimmel ist einfach zu verhindern, leicht zu erkennen und insgesamt sehr selten. Dein Kombucha reift in einem Essigmilieu heran. Das verhindert die Schimmelbildner in der Regel. Also keine Panik!
Hier ein paar Daumenregeln:
Schimmel ist immer trocken und pelzig
Schimmel kann nicht unter der Oberfläche entstehen. Schimmel braucht Sauerstoff.
Schimmel wächst zudem auf der Stelle und breitet sich auch in die Vertikale ohne weiteren Kontakt zum Scoby aus
Kälte (unter 19 Grad) und eine schlechte Nährstofflösung erleichtern das Schimmelwachstum
Wenn du Schimmel entdeckst, dann verfahre wie folgt: SCOBY wegschmeißen (ja, leider!), Glas in die Spülmaschine und falls weitere Kombucha’s in der Nähe vor sich hin fermentieren, dann solltest du diese lieber auch entsorgen. Schimmel bildet Sporen!
2. Wie lagere ich meinen Scoby?
Du kannst deinen SCOBY fast unendlich lange im Kühlschrank lagern. Du solltest sichergehen, dass der SCOBY komplett „unter Wasser“ ist. Lagere den Teepilz in einem verschlossenem Glas – Mason Jar Gläser sind gut! Oder ein geeignetes Kombucha Glas von uns.
Je länger du den SCOBY lagerst, desto länger wird dein erster Brauvorgang nach der Pause dauern.
Du kannst deine SCOBYs auch bei Raumtemperatur in einem Glas lagern, solange genug Flüssigkeit im Glas ist. Dein SCOBY wird dann weiter wachsen.
3. Mein Kombucha hat kaum Kohlensäure
Nahaufnahme von Glas mit Kombucha mit viel Kohlensäure, Kombucha brauen
Wie kommt Kohlensäure in Kombucha? Kombucha muss nicht zwangsläufig Kohlensäure enthalten. Allerdings gewinnt der Kombucha durch Kohlensäure noch mehr von seiner erfrischenden Wirkung und auch der Geschmack kann dadurch noch komplexer werden.
Es gibt ein paar Punkte, auf die du achten solltest, wenn du deinen Kombucha gerne sprudelnd hast:
Kombucha ist nach der Erstfermentation nicht zwangsläufig schon kohlensäurehaltig
Die einfachste Methode zur Anreicherung mit Kohlensäure ist die Zweitfermentation nach der Abfüllung. Stelle die Flaschen einfach geschlossen bei Zimmertemperatur in die Ecke und warte 1-2 Tage.
Der Zuckergehalt deiner abgefüllten Flaschen spielt eine große Rolle für den späteren Level des Kohlensäuregehalts. Zucker wird manchmal in Form von Fruchtsäften, kalt gepressten Säften oder ganzen Früchten zugegeben.
4. Mein Kombucha ist zu süß
Das ist eigentlich gar kein Problem. Es bedeutet ganz einfach, dass du noch nicht lang genug gewartet hast. Dein Kombucha ist noch nicht lange genug fermentiert.
Unser Tipp: Ab dem 6. Tag solltest du jeden Tag probieren, wie dein ´booch schmeckt (So nennen wir liebevoll unseren Kombucha).
Wie probiere ich den Kombucha am besten? Ganz einfach. Nimm einen Löffel oder Strohhalm. Das häufige Probieren wird dein Verständnis für die Verwandlung von Tee zu Kombucha vertiefen.
5. Mein Kombucha ist zu sauer
Du musst einfach die Fermentation früher unterbrechen. Warum schmeckt Kombucha nach Essig? Kombucha wird mit der Zeit zu Essig. Das natürliche Ergebnis der Fermentation. Teste deinen Kombucha also ab dem 6. Tag einfach täglich bis er dir schmeckt
Unser Tipp: Solltest du zu lange gewartet haben, kannst du den essighaltigen Kombucha entweder mit normalem Tee oder mit etwas Zucker vor dem Abfüllen in Flaschen vermengen. Oder nutze ihn als Dressing für deinen Salat.
6. Welcher Tee für Kombucha?
Wenn du dich an die folgenden Regeln hältst, dann kannst du aus fast jedem Tee Kombucha machen:
Der Großteil der pflanzlichen Teemasse sollte auch wirklicher Tee sein (Camellia sinensis). Also weißer Tee, grüner Tee, Oolong & schwarzer Tee.
Wenn du Gewürze nutzen möchtest (Perfekt für den individuellen Geschmack!), dann nimm nicht mehr als 25% bezogen auf die gesamte Teemenge. Zum Beispiel: 10 Gramm Schwarztee und 2,5 Gramm Hibiskus
Gewürze sind kein Ersatz für echten Tee
Bei der Auswahl von Gewürzen solltest du darauf achten, dass die Teekräuter nicht zu ölig sind (z.B. Rooibos). Der Ölfilm legt sich auf die Oberfläche deines Kombuchas und behindert den Scoby beim Wachsen.
Kurz gesagt: Experimentiere mit echtem Tee (Weiß, Grün, Schwarz, Oolong) und addiere dann nach und nach deine Lieblingskräuter wie Hibiskus, Orangenschalen, Lavendel, Anis usw.
7. Süßungsmittel, anstatt Zucker?
Ja, du kannst andere Süßungsmittel für deinen Kombucha verwenden.
Fakt ist: Deine Bakterien und Hefekultur (Scoby) fühlt sich am wohlsten mit dem einfachen weißen Zucker (Die Hefen essen den Zucker!). Aber du kannst deinen Scoby auch an andere Zuckerarten gewöhnen, solange es sich um echten Zucker handelt (Keine Süßstoffe!).
Merke dir: Der Zucker (Glucose und Fructose) ist die Nahrung für deine Scoby. Da versteht er keinen Spaß!
Ein paar Fakten zum richtigen Zuckergebrauch:
Weißer Rohrzucker oder Rübenzucker sind am besten für deinen Standard Kombucha geeignet.
Alternativ gehen natürlich auch Rohrohrzucker und Vollrohrzucker, wobei die Mineralien in der Melasse den Scoby behindern könnten. Im Geschmack wird der Kombucha dann besonders malzig! Ausprobieren!
Du musst deine Kultur an andere Zucker wie Honig oder Ahornsirup gewöhnen. Nimm dir dafür Zeit und ein neues Gefäß.
Künstliche Süßstoffe gehen gar nicht (Von Stevia bis Xylit). Damit können deine kleinen Helfer nichts anfangen und verhungern!
Wenn du Honig nimmst, dann kannst du sogenannten Jun-Kombucha machen, eine besondere Form des Kombucha (mit mehr Alkohol!)
8. Wie viel Alkohol ist im Kombucha?
Als Hobbybrauer wirst du wahrscheinlich einen höheren Alkoholgehalt erzielen als wir als Firma. Das hat mit rechtlichen Gegebenheiten zu tun, die professionelle Brauer dazu zwingen alle Prozesse genau zu überwachen, um einen niedrigen bis kaum enthaltenen Alkoholgehalt am Ende zu erhalten. In Deutschland ist alles unter 1.2 % Volumenprozent Alkoholgehalt unkritisch. Kombucha ist daher ein alkoholfreies Erfrischungsgetränk.
Zu Hause kann es passieren, dass dein Kombucha bis ca. 1.5 % Alkoholgehalt produziert. Wenn du den Alkoholgehalt deines Kombuchas reduzieren willst, teilen wir natürlich gerne unsere Tipps mit dir, wie man alkoholfreien Kombucha brauen kann!
Wir hoffen wir konnten dir helfen auf deinem Weg zum Kombucha-Meister-Brauer!
FAQ
Wie viel Alkohol ist in Kombucha?
Kombucha kann bis zu 1,5 % Alkohol enthalten, wenn man ihn zu Hause braut. Bei Kombucha zum Kaufen liegt der Alkoholgehalt unter 1,2 %, damit es als alkoholfrei eingestuft werden kann.
Wie kann ich den Kohlensäuregehalt meines Kombuchas steigern?
Durch die Zweitfermentation in Flaschen, wird dein Kombucha prickelnd und erfrischend mit reichlich Kohlensäure.
https://www.fairment.de/wissen/kombucha-wissen/kombucha-pilz-verwendung/
11 Verwendungen
Im Folgenden nennen wir Dir 11 Verwendungungen für überschüssige Kombucha-Pilze. Einige davon sind sehr kreativ und unerwartet:
1. Teile deinen SCOBY
Der beste Weg, überschüssigen SCOBY loszuwerden und etwas Gutes zu tun, ist, ihn an einen interessierten Freund, Bekannten oder Verwandten zu verschenken, damit er oder sie ebenfalls mit dem Kombucha-Brauen beginnen kann.
2. Experimentiere mit deinen SCOBYS
Versuche neue Teemischungen, neue Zuckerarten oder neue Produktions-Ansätze aus. Du hast mit dem überschüssigen Kombucha Pilz nichts zu verlieren, also experimentiere ruhig ein wenig herum!
3. Mach dir einen leckeren Smoothie
Gib ein Stückchen SCOBY in Deinen Smoothie und püriere ihn mit – so reicherst Du den Smoothie an. Leckere Kombucha Smoothie Rezepte findest du im Rezepte Bereich.
4. SCOBY-Jerky, voll im Trend
Das meinen wir mit kreativ: Mariniere den SCOBY in Deiner Lieblingssauce für 24 Stunden. Lege den SCOBY anschließend flach auf ein Stück Backpapier und trockne ihn bei 22-30°C, bis er so trocken und konsistent wie Jerky ist.
Decke ihn währenddessen mit einem Tuch/Folie ab, um Insekten fernzuhalten. Du kannst ihn auch unter eine Heizung oder einen Kachelofen legen, dann wird das Ganze beschleunigt. Das Rezept für veganes Jerky ist im separaten Blogartikel.
5. Ersatz für rohen Fisch in Sushi
Machst Du gerne Sushi selbst oder möchtest es lernen, ekelst Dich aber vor rohem Fisch? Ein Kombucha Pilz hat in etwa die gleiche Konsistenz wie roher Fisch und eignet sich daher bestens als vegane Alternative für Sushi.
6. Schonmal eine Gesichtsmaske versucht?
Püriere den SCOBY in etwas Flüssigkeit und verwende ihn als Gesichtsmaske. Mit der Kombucha Gesichtsmaske kriegst du garantiert babyweiche Haut.
7. Wundbehandlung
Ebenso wie Wasserkefir oder Milchkefir wird von manchen Menschen der pürierte Kombucha-Pilz zur Wundbehandlung bei Brand- oder Schnittwunden und Hautinfekten verwendet.
8. Haustier Fütterung
Versuche mal, den SCOBY an Deine Haustiere zu verfüttern. Hasen und Meerschweinchen, aber auch Hunde und Katzen mögen ihn manchmal ganz gerne.
9. Humus für deine Blumen
Gib den SCOBY einfach auf den Kompost, anstatt ihn einfach in den Müll zu werfen. So trägst Du zu einer guten Humus-Bildung bei.
10. Der Scoby als Spielzeug
Trockne den SCOBY so weit, dass er trocken, aber noch flexibel ist. So kannst Du ihn Kleinkindern als Spielzeug geben oder als Knet-Ersatz.
11. SCOBY-Umerziehung: Jun-Tee
Jun-Tee ist ein weiteres, uraltes und fermentiertes Getränk, dem Kombucha nicht unähnlich. Du kannst Jun selber machen, indem Du den SCOBY langsam an Grüntee und Honig umgewöhnst. Langsam, wie gesagt, nicht von heute auf morgen alles umstellen. Das Ergebnis ist eine Art Champagner-Kombucha, der Dich geschmacklich von den Socken hauen wird!
https://culturesforhealth.com/blogs/learn/does-kombucha-have-caffeine-how-much-caffeine
CAFFEINE CONTENT IN DIFFERENT TYPES OF RAW TEA LEAVES (WITHOUT BREWING):
TYPES OF TEA
CAFFEINE CONTENT (MG/G)
Green tea
34.86 mg/g
Black tea
28.54 mg/g
White tea
27.17 mg/g
Oolong tea
19.67 mg/g
Pu-erh
22.4 (mg/g)
Fujian Oolong tea
7.44 (mg/g)
https://www.bbc.co.uk/food/recipes/kombucha_49471
Ingredients
4 tea bags (everyday black tea rather than a speciality tea)
100g/3½oz granulated or caster sugar
1.75 litres/3 pints just-boiled filtered water
1 medium kombucha scoby culture (available online)
Method
First wash your jar, jug or bowl and funnel thoroughly in hot soapy water. Rinse well under very hot water and leave to air dry.
Put the tea bags and sugar in a very large measuring jug or heatproof bowl and pour over the just-boiled filtered water. Give the tea a good stir and leave to stand for 30 minutes. Lift out the tea bags and discard, then leave the tea to cool for a further 30-45 minutes or until lukewarm.
Pour the cooled tea into the prepared jar (you may need to use a funnel if you haven’t steeped the tea in a jug). Place the kombucha scoby into the tea along with the starter liquid it has been stored with.
Place a piece of clean muslin over the top of the kombucha and secure with string or a rubber band. Leave at room temperature, out of direct sunlight. The kombucha will take from a few days to 2 weeks to brew. You will notice it changing colour and becoming a little cloudier as the days pass. After 5 days, spoon a little out and taste. If it tastes more like apple juice than tea, with a pleasant, slight tartness and a little fizz, it should be ready. If not, leave for another day or so and taste again. Some people like a stronger taste, so will leave longer (about 7–10 days), but to start with, you may want to drink when it is a little milder.
Transfer the scoby and approximately 150ml/5fl oz of the tea to a clean bowl, ready to make the next batch. Use as a starter liquid to make the next brew or cover and store in a cool, dark place for up to 5 days if you plan to use it again. Strain the rest of the brew through a fine sieve into clean, lidded bottles. Secure the lids and place in the fridge to chill. Drink within a week.
The kombucha will begin to become slightly fizzy at this point, and will get more fizzy the longer it is stored. This is caused by the bacteria within the liquid naturally producing carbon dioxide. Make sure you ’burp’ the bottle(s) every day or so to release the build-up of gas. If you leave your bottled kombucha at room temperature for a day or two before putting in the fridge, it will become fizzier more quickly.
You can begin drinking the kombucha straight away, but it's best to start with small amounts (to avoid any digestive upset as your system gets used to the bacteria).
Recipe Tips
If your scoby is new, you will need to reduce the amount of kombucha you make for the first few times in order to have the best chance of success. Try using 1–1.5 litres/1¾–3 pints pints of just-boiled water with 3–4 teabags and 75g/2½oz sugar.
The scoby will produce its own gelatinous ‘baby’ as it ferments and later the mother and baby can be separated and the baby used to start a new fermentation. If there is a batch that smells rotten or becomes mouldy it should be discarded.
Filtered water is necessary for this recipe because tap water often contains a small amount of chlorine, which will inhibit the fermentation process. Either use a filter jug or bottled water.
https://www.kombucha.com/learn/knowledge-base/kombucha-ph/
How does pH affect kombucha?

From the experience of somebody drinking a kombucha, pH mostly affects the flavor. The lower the pH, the more acid in the kombucha, and the more vinegary tartness the booch will have. However, the important information is in the biochemistry and getting your brew started.
Here’s the deal: when you first start your ferment, your brew is at the most vulnerable to foreign invaders (mold, other yeasts, and bacteria). This is because because there is far less beneficial bacteria (and the beneficial acid they produce) to fend off the bad guys. So how do you fend off the bad guys? With proper pH!
The bacteria and yeast in a healthy kombucha scoby thrive in an acidic environment of 4.5 of less. The invaders that can spoil your kombucha thrive in less acidic environments of above 4.5. This is why it is so important to check the pH of your brew a few minutes after adding your starting liquid. Starting a batch with too high of pH is almost always the reason a batch (brewed from a previously healthy scoby) fails.
Never start your brew higher than 4.5! Here at the brewery, we start at 4 and finish at 3. Remember, the lower you start, the more yeast and bacteria you added with the starter liquid, so the faster your ferment will finish.
When you start your brew…

We suggest starting your ferment at a pH of 4, but never start higher than 4.5. Starting higher will exponentially increase the likelihood of your batch molding — and it will also take longer to ferment. Most commercial breweries start at a pH of 4 and finish at a pH of 3. (If we keep in mind the logarithmic nature of the pH scale, that means the kombucha becomes 10x more acidic during the fermentation, due to the magic of the yeast and bacteria!)
The most common reason for inconsistent results at home is because of inconsistent starting pH. If it has been months since you’ve made a batch and your booch turned to vinegar, you won’t need as much starter. If it’s been fermenting less than a week and you need to make more, you’ll need more starter, because that batch is not nearly as strong. But how will you know..unless you check your starting pH, every time?!
What do I do if I don’t have enough starter liquid to get my pH to 4.5?

Whoa Nelly, you’re in a bit of a pickle! No promises, but there’s a simple way you can probably save your batch. Get some distilled white vinegar, and add it just a little bit at time till you get your pH down. Because you’re low on good bugs (beneficial bacteria and yeast), you probably want to start a little lower than you normally do to give your brew the best fighting chance. We suggest 3.5-3.8 when trying to revive a scoby — or when you didn’t start with quite enough starter liquid.
https://www.kombucha.com/primary-fermentation-f1-brewing-instructions/
NEVER ALLOW YOUR BREW TO FALL BELOW 74°F — COLD EQUALS MOLD!
If you’re serious about brewing pro-quality kombucha at home, every time – consistency is key – and pH strips, a thermometer, a heat mat, quality tea, quality flavoring for secondary fermentation (if desired), and keeping good notes in a log are a must. Remember, if you use a heat mat, do not allow your brew to go above 84°F – higher temps can stress your culture (or kill it, if high enough) and/or create undesired off-flavors. For additional detailed videos, tutorials, directions, and learning tools, go to kombucha.com/raw-university. Please also checkout our other Free Brewing Tools & Resources.
https://myfermentedfoods.com/how-make-kombucha/
We all can make mistakes, though it’s hard to admit it. For first time Kombucha brewers and perhaps even well- known brewers we can all learn from others.
There are times that even when you try to do everything right you run into problems.
Here are some common mistakes:
How can you tell if the Kombucha is working or culturing properly?
Any change may not be visible.
Liquid may turn cloudy due to growth of SCOBY.
Aroma will be less sweet more vinegary.
Make sure your temperature is at least 72 degrees F.
Make sure your sweet tea you added was not too hot.
What if you see brown stringy particles?
They are natural yeast growth which is a harmless natural by product.
What if the SCOBY is moving?
Normal movement is OK; it may sink, rise or go sideways.
Does the size of my SCOBY make a difference?
No even a small SCOBY will ferment a gallon. It is recommended to use a 3 inch diameter culture.
My SCOBY has mold, a blue or black color; What do I do?
I recommend discarding the whole batch because it is contaminated or worn out. Make sure you clean out your container extremely well to avoid future contamination.
Note: Yeast is brown not BLACK, and often stringy but it is normal.
If you see critters or fruit flies and there is only a few you can rinse of the SCOBY with vinegar. If there are too many critters then toss your SCOBY and start with a new one.
Is there not enough carbonation?
Since fizz is part of the fun, your SCOBY may need to mature for a few brews before it will make more fizz.
Alternatively you can use green tea versus black tea which seems to add more fizz.
SCOBY hotels can occur when you become overrun with mother or Baby SCOBY’s and then you give some away for others to start their own brews.
Or you can start several back-up SCOBY’s in jars in your cabinet for when you need a replacement, called a SCOBY hotel.
If you forget or not realize it, you should never refrigerate, rinse off, or put SCOBY’s in direct sunlight which can weaken the organisms or create an inhospitable environment for growth.
You should never need to add vinegar to your fermentation, especially not apple cider vinegar, since it can introduce vinegar eels, while harmless to humans, they can damage your SCOBY.
Over-steeping your tea can cause more bitterness, so brew only recommended times.
Stir your first brew before you bottle, preparing for 2nd fermentation, this blends in yeast which tend to settle in bottom, instead of just pouring from the top.
Is Kombucha alcoholic?
Yes, but it is usually less than 0.5% to 1% and is a by- product of fermentation. Normally, it is not enough to worry about, but you can inform someone in case they are only drinking non-alcoholic drinks.
Can I use less sugar, since I like cutting down on my sugar intake?
The experts strongly recommend staying with sugar-tea-water ratio so your starter cultures will ferment and brew safely. You can use organic cane sugar but white sugar is best for brewing.
Remember that this sugar is for the SCOBY to grow and ferment; so the amount of sugar decreases as more tart your drink becomes. The longer it ferments the less sugar you have.
No one recommends using sugar replacements, not even stevia, honey or maple syrup. Experts have found that the mother SCOBY culture needs real sugar to ferment and grow good bacteria.
How long does it take to make kombucha?
If fermenting in the batch method then 7-12 days depending on your temperature and strength of your SCOBY. If brewing the continuous method you let it brew 2-4 weeks but drink it any time after 1 week, depending on the flavor.
Do you have to be 21 years old to buy, (or legal age in your state)?
No. Most local groceries or health food stores sell kombucha in the drinks or soda sections of the store; no legal laws would apply.
Kombucha drinks are not classified as alcohol. There are some companies that are now brewing Kombucha with more alcohol, they would be more than 3% and would be sold only in the beer departments or liquor stores.
Does it have caffeine?
Yes, since you use tea to brew kombucha. Tea is lower in caffeine than coffee and the longer Kombucha ferments the lower the caffeine.
You can use distilled white vinegar in place of your tea to brew, it will take longer to ferment and grow a SCOBY.
Can you drink too much Kombucha?
If you are not already drinking store bought Kombucha then experts recommend you start with 1-2 ounces. See how you react or if you can tolerate it. Increase your Kombucha drinking slowly to 8 ounces. After that you can decide how often you want to enjoy your brew, either daily or less.
More than 1 bottle or 8 ounces per day is not necessary. Fermented foods are effective in smaller doses. It is better to diversify your types of fermented foods versus just drinking Kombucha all day.
Many of us may desire to do that! But….. you can overdo the probiotic aspects of your brew!
Is it vegan?
Yes, there are no dairy or animal products in Kombucha, start to finish.
Does it contain gluten, dairy or animal products?
No, Kombucha cultures only contain filtered water, tea and organic sugar.
What are the side effects of drinking too much Kombucha?
Some individuals can react with bloating and abdominal discomfort. Some find no benefits at all. And others feel it makes them feel better from any number of various symptoms.
There is a potential to affect your teeth overtime; due to the amount of acids, if you are over-consuming Kombucha.
Does Kombucha expire?
No, as long as you have liquid covering the SCOBY, and it has not been contaminated, it can last a long time. Also, make sure you have a lid or a cloth cover on your container so it does not dry out.
You may not like the taste if it’s over 30 days and you have not added or taken out any to drink; since it will become very tart and vinegary.
Can you use flavored, decaffeinated tea or herbal teas?
Not generally since they contain essential oils which could kill the bacteria. And many are processed with chemicals if store bought or in tea bags.
You can use natural herbal tea flavorings if you know they have not been processed.
Teas like Rooibos and Hibiscus make wonderful Kombucha, and have no caffeine. Although, experts say to add about 25% green tea on every other batch for long term health of your SCOBY.
What is pH?
Your pH is your acid- alkaline balance in your body. It stands for power of Hydrogen, the pH scale goes from 1-14, 1 is acidic and 14 are most alkaline. A pH of 7 is considered neutral.
In making Kombucha, you use pH strips to get your brew in a 3.5 to 2.5 reading; this is to prevent the growth of harmful microorganisms. Gluconic acid produced in Kombucha is a pH regulator.
What is the best time to drink your Kombucha?
The advice varies, so there are no studies or set times. Try it on an empty stomach, like when you first get up in the morning or drink it with your meal to help digestion.
Let your body tell you what works better for you!
What do you do with your Kombucha, when you go on vacation?
It is good for 30 days or more just make sure it is covered with liquid so it does not get dry, it is not in direct sun and is not cold.
Lemon & ginger
Matcha green tea
Mango juice
Lime juice
https://myfermentedfoods.com/how-make-kombucha/
Blue Ginger Kombucha
Something sweet and tangy with some Zing! Ginger is a great anti-inflammatory, good for tummy upset and blueberries are the prize for the highest antioxidant out of all the berries!
Take 1 cup of fresh or frozen blueberries with fresh grated ginger and make simple syrup. Smash those blueberries to get all their goodness.
Add some sugar in a cup of water and simmer this mixture with your blueberries until well mixed and sugar is dissolved.
Take it off the heat and let it cool to room temperature.
Pour it over into a clean new gallon or 4 quart jar. Then pour your 1st fermented Kombucha and add it to your new jar or divide it up if using smaller jars.
https://www.culturedfoodlife.com/8-ways-to-2nd-ferment-kombucha-and-water-kefir/
Bottled Juice
My favorite way to second ferment is by using bottled juice. I use 2 ounces of juice to a 16 ounce bottle and fill the rest with plain kombucha or water kefir. I then allow this to ferment for a few more days (timing varies depending on the recipe and temperature). This is the easiest process for beginners to get fizz with their ferments and is the most consistent.
For bottled juice kombucha: I usually second ferment 5-14 days with bottled juice. Less time is needed if your home is warm (above 75 F).
For water kefir: water kefir will second ferment in 1-3 days.
Raw Juice
I love using raw juice for second fermenting. However, the results aren't as consistent as using bottled juice due to the raw juice's natural enzymes. Also, the raw juice naturally has a higher water content. This can make your second ferments less easy to predict and not always as flavorful. (Bottled juice has been pasteurized so some of the water in the juice has been evaporated out and the flavor intensifies). When using raw juice, you should cut down your fermentation time quite a bit as the raw juice has less natural sugar than bottled juice and will ferment more rapidly.
For raw juice kombucha: I usually only second ferment with raw juice for 2-4 days.
For water kefir: raw juice water kefir will second ferment in 1-2 days.
Fresh Fruit or Frozen Fruit
Much like raw/fresh juice, you will want to keep an eye on this type of second ferment. I never use more than 1/4 cup of fruit and often use less, like one piece of fruit for a bottle. Keep in mind, if you use fruits that have a low natural sugar content (like cranberries or lemons), you might want to add a pinch of sugar to boost the fizz production along (usually 1/2 teaspoon for a 16-ounce bottle). It can also be difficult to get the fruit into the bottle and then get it out. You'll need to cut it up to fit it into each bottle. Frozen fruit works great for second fermentation too. It behaves similarly to fresh fruit.
For kombucha: second ferment for 2-5 days
For water kefir: second ferment for 1 day (unless your home is cool)
Watch out when you open the jar, sometimes the fruit will come flying out!
Syrups
I love making homemade syrups for second ferments! You can use wonderful herbs, seeds, and more to make delicious flavors and provide wonderful fizz! I only use 1-2 tablespoons of syrup per 16 ounce bottle so the homemade syrups go a long way. These syrup recipes can take a bit longer to second ferment so keep that in mind.
For kombucha: I usually do my syrup ferments for 5-14 days (depending on temperatures).
For water kefir: second ferment for 2-3 days.
You can find all my syrup recipes here:
Herbs and Spices
If you are wanting to use something like vanilla beans, star anise, or lavender to do a second ferment and don't feel like making a syrup, no problem! You can simply add a teaspoon or so of whatever spice you want to add and 1/2-1 teaspoon of sugar to each 16 ounce bottle and allow to ferment!
For kombucha: second ferment for 2-4 days (depending on temperatures)
For water kefir: second ferment for 1-2 days
Fruit Jams or Jellies
You can actually get creative and add something like jam or jelly to second ferment your kombucha. I have done this when I didn't have any other types of juice or fruit on hand. You only need 1/2-1 tablespoons of jam or jelly to do a second ferment. I sometimes like to strain my kombucha or water kefir before drinking when I use this method.
For kombucha: second ferment for 3-7 days.
For water kefir: second ferment for 1-3 days
Honey, Sugar, Maple Syrup, Molasses
If you want an "original" or plain flavored kombucha but still want the fizz, you can do a second ferment by adding 1/2-1 teaspoon of sugar, maple syrup, honey, or molasses to a 16 ounce bottle and fill with plain kombucha or water kefir.
For kombucha: second ferment for 5-10 days.
For water kefir: second ferment for 1-3 days.
Dried Fruit
You can use dried fruits like figs, dates, cranberries, pineapple, or raisins. One tablespoon of dried fruit works great for a 16 ounce bottle.
This method only takes a few days! If you are using unsweetened dried fruit like pineapple or cranberry you may want to add 1/2 teaspoon of sugar as well to the bottle. The dried fruit doesn't provide a ton of flavor, but is great in a pinch and has a unique taste. I always strain before drinking :)
For kombucha: second ferment for 2-5 days.
For water kefir: second ferment for 1-2 days.
https://www.liveeatlearn.com/best-kombucha-flavors/
Best Kombucha Flavors
After brewing homemade kombucha for years (and helping hundreds of people brew their own too), I’ve settled on a few favorites. Here are my top 19 best kombucha flavors you can make at home!
This Lemon Ginger Kombucha is a classic citrus flavor that has quickly become my easy go-to kombucha flavor.
Get Recipe
This Peach Pie Kombucha recipe has juicy peaches, maple syrup, and a hint of vanilla (in other words, you’re going to love it!)
Get Recipe
A fruity brew that has a gorgeous color and adaptable flavor (I love adding lemon, ginger, or vanilla to it!)
Get Recipe
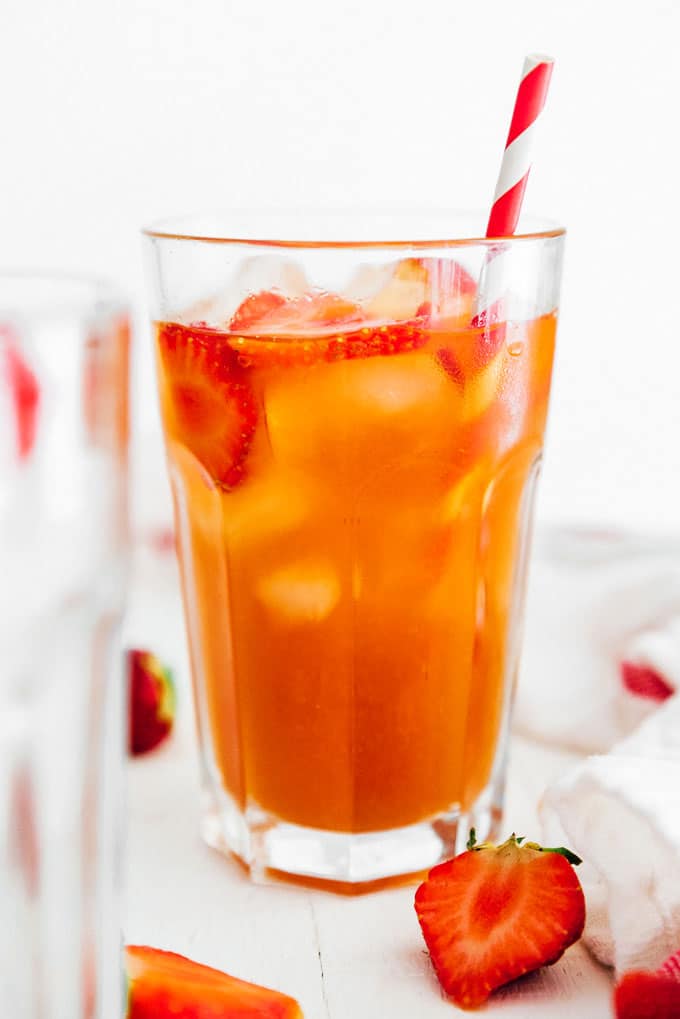
Strawberry Kombucha is classic fruit flavor that's great on it's own or in Kombucha Floats!
Get Recipe
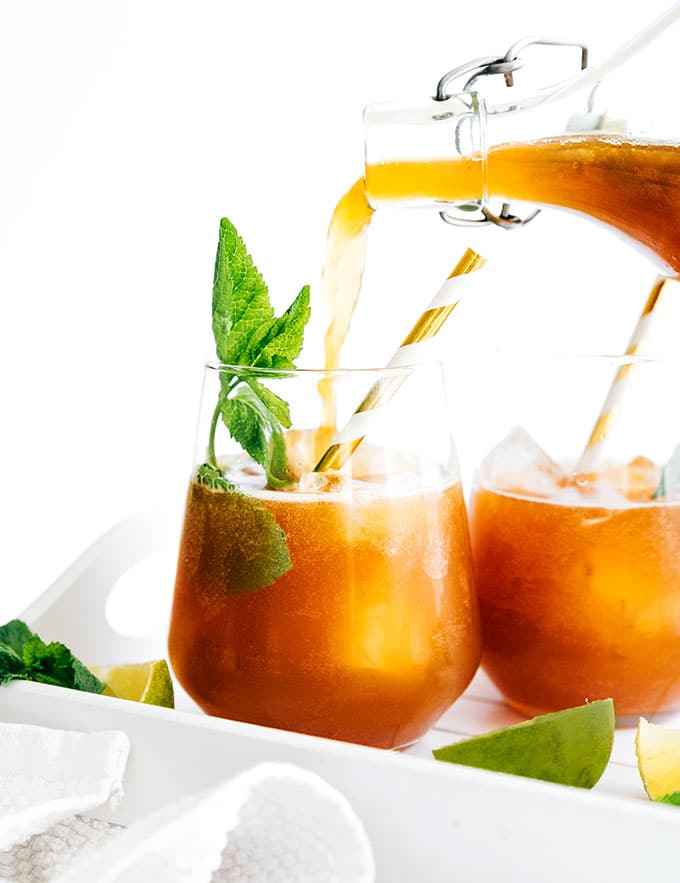
This Mojito Flavored Kombucha is refreshing, zesty, and makes for a fun non-alcoholic cocktail (but of course, you can sneak in some booze too!)
Get Recipe
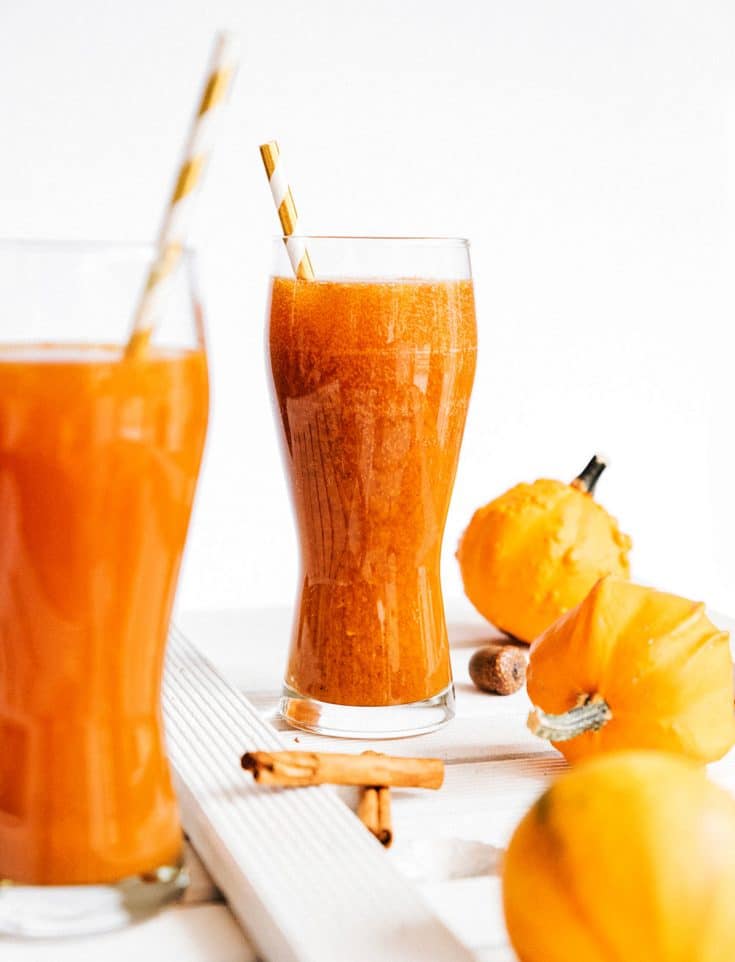
This seasonal flavor is full of fresh pumpkin puree and seasonal spices, making for a rich and delicious brew.
Get Recipe
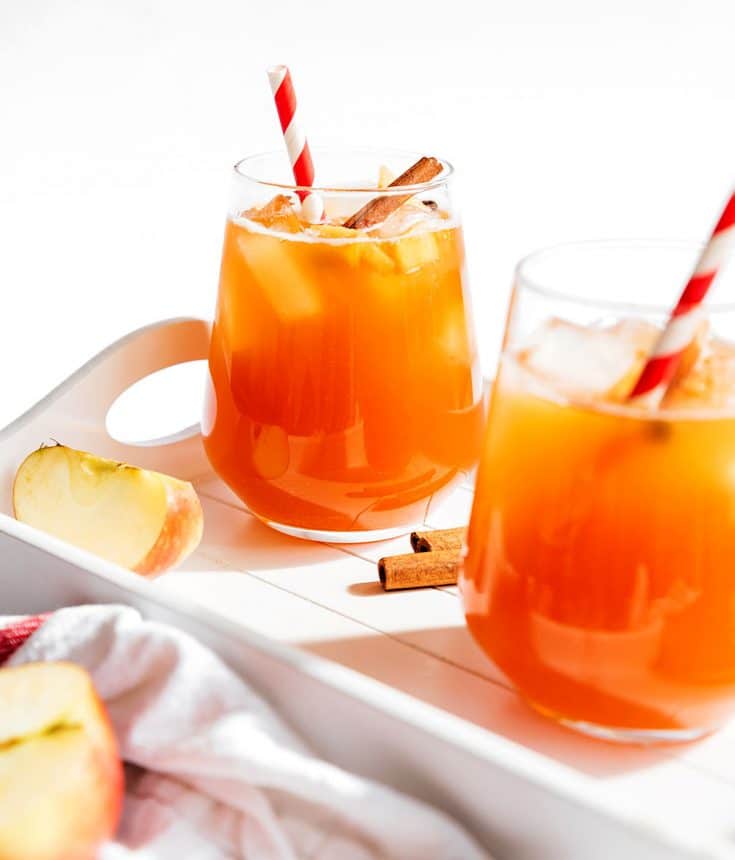
With sweet apples and cinnamon, this kombucha ferments into a bubbly drink that tastes a bit like apple cider
Get Recipe
This Ginger Pepper Kombucha recipe takes classic ginger kombucha and gives it a spicy kick!
Get Recipe
The sweet mango balances out the tart kombucha and transports you right to a beach on Hawaii.
Get Recipe
Not so much a flavor (but a way of life). This is my favorite way to enjoy kombucha! (Recipe on our new kombucha website, BrewBuch.com!)
Get Recipe

This Pineapple Basil Kombucha is delightfully tropical with an herby twist!
Get Recipe
Inspired by the widely popular Trilogy™ Kombucha, with refreshing flavors of raspberry, lemon, and ginger! (Recipe on our new kombucha website, BrewBuch.com!)
Get Recipe
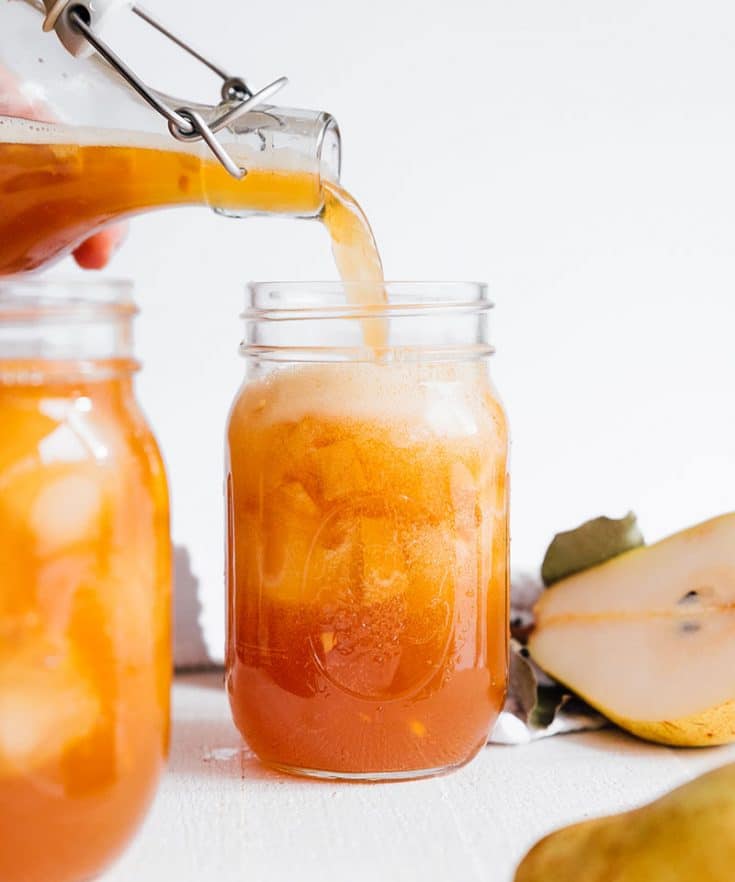
A cool weather flavor full of juicy pears and warming spices! (Recipe on our new kombucha website, BrewBuch.com!)
Get Recipe

A classic combo that you probably haven't tried yet! (Recipe on our new kombucha website, BrewBuch.com!)
Get Recipe
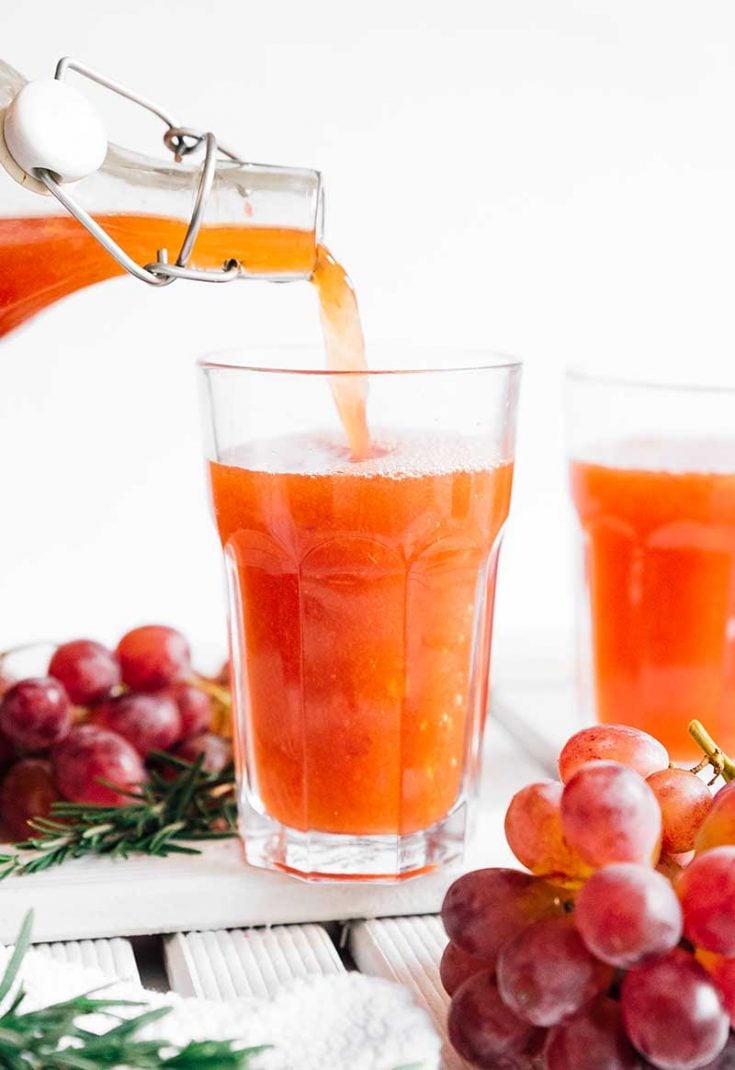
They say what grows together goes together, and this Rosemary Grape Kombucha is delicious evidence of that. (Recipe on our new kombucha website, BrewBuch.com!)
Get Recipe
A sweet and fragrant flavor that tastes like a cross between berry pie and cream soda! (Recipe on our new kombucha website, BrewBuch.com!)
Get Recipe
A health-packed way to supercharge your kombucha. (Recipe on our new kombucha website, BrewBuch.com!)
Get Recipe
A simple, festive flavor for serving at holiday get togethers. Spruce it up by adding some pomegranate arils before serving! (Recipe on our new kombucha website, BrewBuch.com!)
Get Recipe
An antioxidant packed fermented brew that even the beet haters might like! (Recipe on our new kombucha website, BrewBuch.com!)
Get Recipe
How can you flavor kombucha with frozen fruit?
Frozen fruit can be used to make kombucha, just be sure to thaw it before adding it to the kombucha.
Can you eat the fruit from kombucha?
Yes! The acidity of the kombucha preserves the fruit, meaning it is just as edible as the kombucha is drinkable!
Can you add herbs to kombucha?
Herbs add a fun new dimension to homemade kombucha! For hardy herbs (like rosemary or thyme), simple add the whole sprig. Tender herbs (like mint or basil), can be added on the stem, roughly chopped, or blended.
https://www.youbrewkombucha.com/flavor-ideas
Passionfruit-Pomegranate: Goya Fruita frozen passionfruit pulp + POM pomegranate juice + sugar
Blackberry-Mint: pureed blackberries + a few whole mint leaves
Blood Orange-Blackberry: blood orange juice + blackberry puree
Tangerine-Rosemary: tangerine juice and zest + a sprig of rosemary
“Sangria:” grape juice + apple juice + pear juice + orange juice and zest + dash of cinnamon
Raspberry-Ginger-Lemon: pureed raspberries + ginger juice + lemon juice and zest
This is a riff on GT’s Trilogy recipe, but I think homemade is better, if I do say so myself!
Citrus Mint: orange juice and zest + lemon juice and zest + sugar + mint leaves
Mango-Pineapple: pureed mango + pineapple juice
Oro Blanco Grapefruit: oro blanco grapefruit juice
If you can find oro blanco grapefruit, those are sweeter and have a mellow, honey flavor compared to regular ruby red grapefruit
Plum-Thyme: plum juice + a few sprigs of thyme
Cherry-Ginger: cherry juice + ginger juice
Strawberry-Lemon: pureed strawberries + lemon juice and zest
Watermelon-Lime: watermelon juice + lime juice and zest
“Mint Julep:” lime juice and zest + sugar + mint
Pear-Rose: pear juice + rosewater
Use the rosewater sparingly, it can be overpowering
Apple-Raspberry: apple juice + pureed raspberries
Apricot-Hibiscus: apricot juice + dried hibiscus flowers steeped in water + sugar
Alternatively you can use bagged hibiscus tea
Peach-Orange Blossom: peach juice + orange blossom water
Use the orange blossom water sparingly, it can be overpowering
https://www.kombuchakamp.com/10-easy-recipes-for-flavoring-kombucha
Flavorings go into the bottle first.
Summer Breeze Kombucha – Lavender and Chamomile
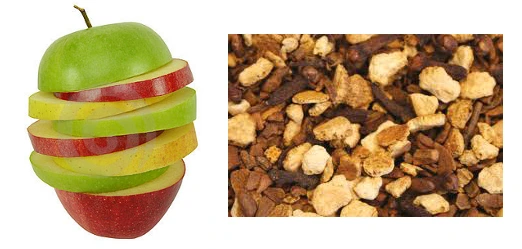
Apple Pie Kombucha – Apple & Chai Spice
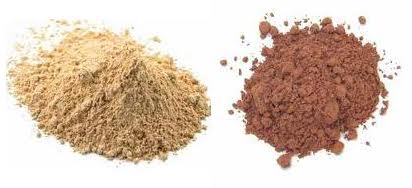
Cuzco Chocolate Kombucha – lucuma powder & raw cacao powder
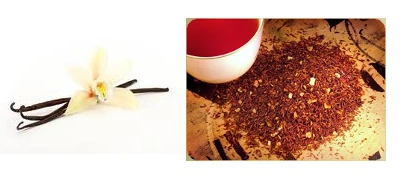
Vanilla Rooibos Kombucha – Vanilla Bean & Rooibos Tisane
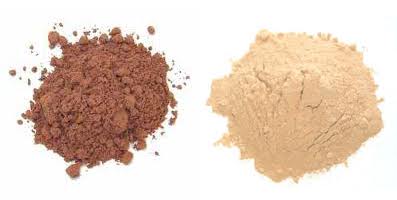
Cacao Pow Kombucha – Raw Cacao Powder & Maca Powder
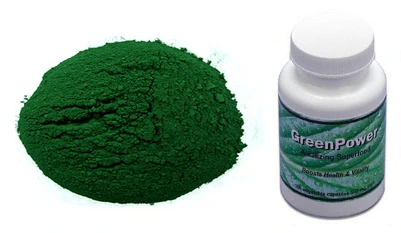
Green Machine Kombucha – Green Superfood Powder
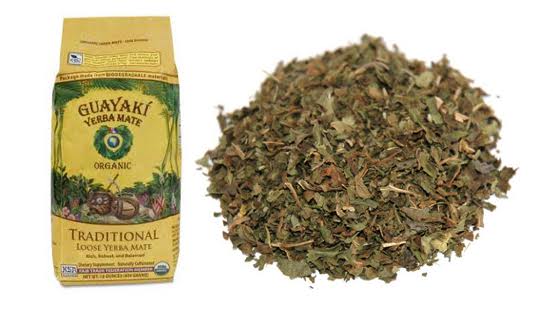
Mate Mint Kombucha – Yerba Mate & Peppermint Tea
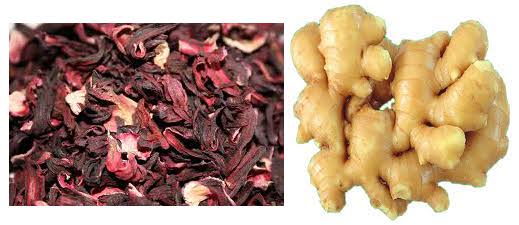
Hibiscus Ginger Kombucha – Hibiscus Flower & Organic Ginger
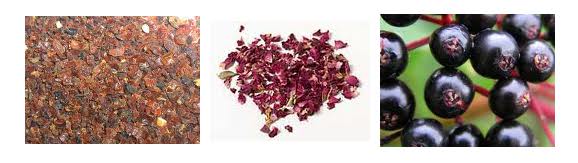
Roseberry Kombucha – Rose Hips, Rose Petals & Elderberries
Brain Brew Kombucha – Gotu Kola & Ginko Biloba
https://fermentaholics.com/kombucha-second-fermentation/
3. How to flavor kombucha.
When deciding how to flavor your kombucha, choose your favorite fruits, juices, herbs, or spices to create your own flavor concoctions! You’re going to add them right into the bottom of the bottles. It’s better to add them before you add kombucha so you don’t overflow the bottles.
There are no rules on what or how much to add–it really depends on how much of the raw kombucha you want to taste, or how long you’ve let your brew ferment.
Kombucha Recipe Flavors – Rule of Thumb – A good starting point for adding flavor to 16 oz bottles:
-Juice or Fruit: 10% (or about 1/3 of a cup)
-Fresh Herbs (mint, basil, thyme): 1-2 TBSP if chopped
-Spices (cinnamon, clove, cayenne, turmeric): 1/8-1/4 tsp
https://sandbox.fermentaholics.com/lemonberry-mint-kombucha/
Lemonberry Mint Recipe
INGREDIENTS
Kombucha: You need kombucha that has completed primary fermentation and is ready to bottle and flavor.
Mint Leaves: Adds a clean, energizing flavor and aroma. Add about 1 sprig or 3-5 large leaves per 16 fl oz bottle.
Strawberries: You can use fresh or frozen Strawberries. You’ll need 4-5 strawberries, quartered or pureed, per 16 fl oz bottle of Kombucha.
Lemon Juice: For each bottle, use 2 tbsp of lemon juice, then some to cut up for garnish (optional). Fresh lemon juice is tart and bright. It’s a great addition to any water kefir recipe but also plays well with other citrus fruits.
https://sandbox.fermentaholics.com/komblueberry-bliss/
Komblueberry Bliss
INGREDIENTS
Kombucha: You need kombucha that has completed primary fermentation and is ready to bottle and flavor.
Blueberries: You can use fresh or frozen Blueberries. If frozen, wait for them to thaw. For each 16 oz bottle, you’ll need 10-13 blueberries, cut in halves.
Candied Ginger: A secret weapon ingredient for kombucha flavoring. Candied ginger has a bit of sugar on it, which will get consumed during the secondary fermentation, and result in fizzy, flavorful kombucha! Plan on dicing about 2-3 pieces of candied ginger (or swap out with 1 tbsp fresh ginger) per 16 oz bottle.
Fresh Basil: Use 3-5 leaves per 16 oz bottle.
https://sandbox.fermentaholics.com/blackberry-cucumber-kombucha-recipe/
Blackberry Cucumber Kombucha Recipe
INGREDIENTS
Kombucha: Use kombucha that has completed primary fermentation and is ready to bottle and flavor.
Fresh Cucumbers: A trip to your local grocer will find you this staple ingredient, and be sure to look for a dark, ripe green without any blemishes and one that is firm to the touch. These will result in the most uplifting infusions in your brew
Fresh Blackberries: A deep purple to black when freshest, blackberries are a naturally sweet, tart, and earthy treat and can be found at most of your mainstream grocers. The best blackberries will also be firm, absent of any white or green patches, and with consistent coloring throughout.
https://sandbox.fermentaholics.com/ginger-mojito-kombucha-recipe/
Ginger Mojito Kombucha Recipe
INGREDIENTS
Kombucha: You need kombucha that has completed primary fermentation and is ready to bottle and flavor.
Ginger: Chopped candied ginger or fresh ginger
Lime Juice: Fresh lime juice or bottled.
Mint: Fresh mint leaves.
https://growyourpantry.com/blogs/kombucha/second-ferment-kombucha-the-complete-guide#section5

Hibiscus kombucha
Inspired by The Organic Goatlady, this recipe is great and we would recommend checking them out for more information: The Organic Lady
Ingredients
4 tsp. dried hibiscus petals
1 tbsp. freshly squeezed lemon juice
16 oz raw kombucha
Instructions
Measure out the kombucha into the glass bottle and add the dried hibiscus petals and freshly squeezed lemon juice
Reseal the bottle and ensure its airtight, give it a gentle shake and transfer it to the fermentation area.
Allow the brew to ferment for three days before transferring to the refrigerator for storage
Ginger Kombucha
Inspired by Fermentation Recipes, for more information, check out their website: Fermentation Recipes!
Ingredients
1 teaspoon Freshly cut ginger
¼ tsp turmeric powder
16 oz raw kombucha
Instructions
Use a funnel to pour the raw kombucha into a glass bottle
Add the turmeric powder and freshly cut ginger and give the bottle a gentle shake
Seal the bottle and move to the fermentation area. Allow the brew to ferment for 3 to 5 days
Lemon & Ginger Kombucha
Inspired by Live Eat Learn, to see more click here: Lie Eat Learn
Ingredients
½ gallon raw kombucha
2 lemons
2 tsp white sugar
1 thumb freshly grated ginger
Instructions
In a large glass bowl, add the juiced lemons, white sugar and freshly grated ginger. Mix thoroughly
Gently pour the kombucha into the glass bowl and use a wooden spatula to mix it with the flavoring ingredients gently
Use a funnel to fill the fermentation bottles with the mixed kombucha gently
Seal the bottles airtight and transfer to the formation area for 3 to 5-day second ferment
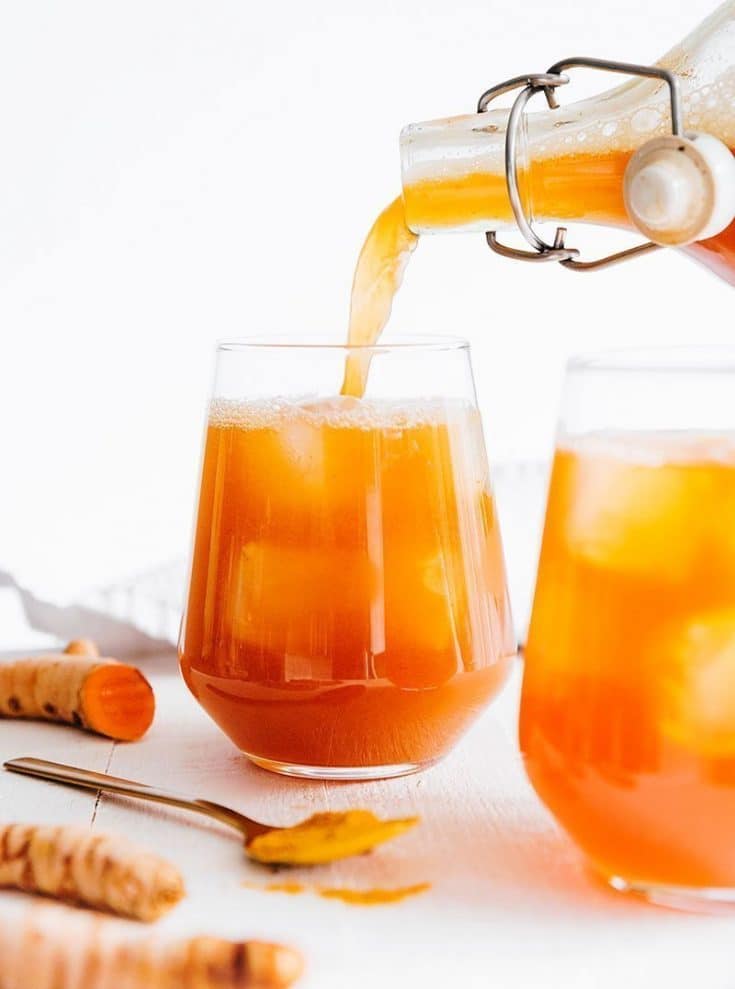
Turmeric Kombucha
Inspired by All the Nourishing Things, you can check them out here: All The Nourishing Things.
Ingredients
16 oz raw kombucha
1 tablespoon ginger, freshly chopped
1 tablespoon turmeric root, freshly chopped
2 tablespoons white sugar
Instructions
Add the ginger, turmeric root, and white sugar into the fermentation bottle
Gently pour in the kombucha all the way to about 2 inches from the top
Seal the bottle and move it to the fermentation area away from direct sunlight. Allow the brew to ferment for 3 to 6 days, depending on your taste preferences.
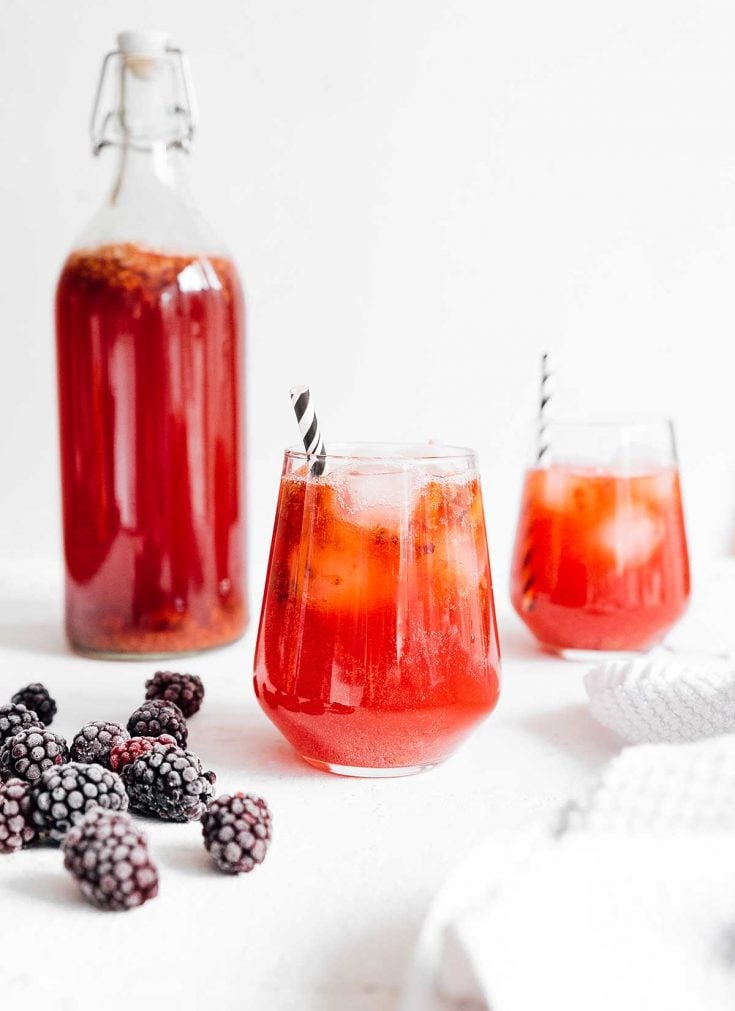
Blackberry Vanilla Kombucha
Inspired by Brewbuch, we would recommend checking them out for more information: Brew Bunch.
Ingredients
½ gallon raw kombucha
½ cup blackberries
10 g white sugar
½ teaspoon vanilla
¼ cup water, unchlorinated
Instructions
Add the water, blackberries, and sugar in a saucepan and bring to boil over medium heat. Mash the berries until a thick paste is formed. Allow the paste to cool down to room temperature
Evenly distribute the paste and vanilla into the fermentation bottles and gently pour in the raw kombucha
Seal the bottles and transfer them to the fermentation area for the next 3 to 5 days
Blood Orange-Flavored Kombucha
Inspired by Kombuchakamp, this recipe is great and we would recommend checking them out for more information: Kombucha Kamp.
Ingredients
½ blood orange, juiced
½ teaspoon of ginger
½ teaspoon clove
16 oz raw kombucha
Instructions
Add the blood orange juice, ginger, clove, and raw kombucha into the fermentation bottle and give it a gentle shake
Seal the bottle airtight and transfer it to a dark area away from direct sunlight and allow it to ferment for the next 3 to 5 days
Raspberry Lime-Flavored Kombucha
Inspired by Paleo Running Momma, this recipe is great and we would recommend checking them out for more information: Paleo Running Momma.
Ingredients
1-gallon raw kombucha
2/3 cup raspberries, freshly chopped
¼ cup lime juice, freshly squeezed
Instructions
Mix the raw kombucha, raspberries and lime juice in a glass bowl
Pour out the mixture into the fermentation bottles leaving 2 inches of headspace in each
Replace the lid and transfer the bottles to the fermentation area for the next 3 to 5 days
Watermelon Kombucha
Inspired by Bucha Brewers, this recipe is great and we would recommend checking them out for more information: Bucha Brewers.
Ingredients
¼ cup of watermelon slices/juice
4 sliced blackberries
14 oz raw kombucha
Instructions
Use a funnel to add the watermelon juice, blackberries, and raw kombucha into the fermentation bottle
Seal the bottle and give it a gentle shake before moving it to the fermentation area
Allow the brew to ferment for 3 to 5 days before moving it to the fridge for storage
Peach Flavored Kombucha
Inspired by Live Eat Learn, this recipe is great and we would recommend checking them out for more information: Live Eat Learn.
Ingredients
½ gallon raw kombucha
1 ripe peach, finely diced
2 tablespoons maple syrup
½ teaspoon vanilla extract
Instructions
Evenly divide the raw kombucha, finely diced peach, maple syrup, and vanilla extract amongst the fermentation bottles
Seal the bottles and give them a gentle shake to mix up the ingredients before moving them to the fermentation area
Allow the brew to ferment for 3 to 10 days depending on your taste preference
Apple Cinnamon Kombucha
Inspired by Live Eat Learn, this recipe is great and we would recommend checking them out for more information: Live Eat Learn.
Ingredients
½ gallon raw kombucha
1 apple, finely diced
½ teaspoon ground cinnamon
Instructions
Mix the raw kombucha, finely diced apple, and cinnamon in a glass bowl using a wooden spoon to stir gently
Pour mixture into the fermentation bottles leaving a 2-inch headspace in each
Seal the bottles and transfer them to a dark area within room temperature.
Allow the brew to ferment for the next 3 to 10 days or until it attains the required carbonation level
https://commonsensehome.com/holiday-kombucha-flavors/
For each recipe below, add the ingredients listed into your container first, and then fill the rest of the container with unflavored kombucha tea.
Most of these start with kombucha tea made with black tea, unless otherwise noted. Flavorings were added to a 16 ounce bail top jar, or a pint or quart mason jar, as noted. Flavorings are added after the initial brew when the kombucha is bottled. You add the flavorings and fill jar with plain kombucha. Serve immediately, or store for a few days (sealed) to increase carbonation.
Recipes with spices are best consumed within a few days, otherwise you may diminish the health benefits of your kombucha. (Many spices are antibacterial, and kombucha is made up in part of bacteria).
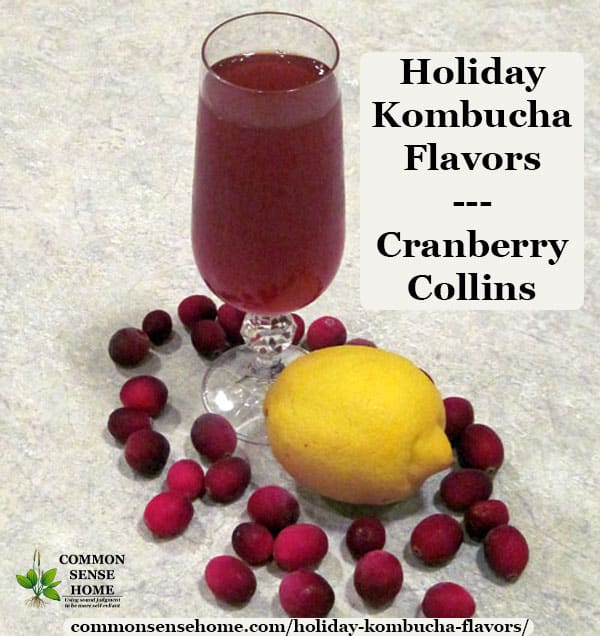
Cranberries are so abundant during the holidays that cranberry collins is a natural first choice for our holiday kombucha flavors.
To a quart jar add:
1/2 cup cranberry juice, plain unsweetened
1 tablespoon lemon juice
1 tablespoon maple syrup
To a 12 ounce jar add:
1/4 cup cranberry juice, plain unsweetened
1 1/2 teaspoon lemon juice
1 1/2 teaspoon maple syrup
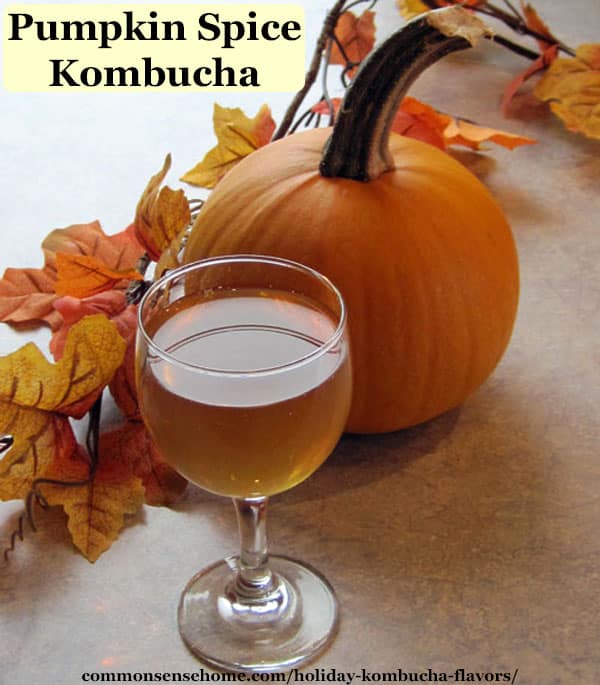
To a pint jar add:
2 tablespoons pumpkin puree
A “shake” each of powdered nutmeg, cloves, cinnamon and ginger
3 drops liquid vanilla stevia (optional)
When ready to serve, strain or pour off the top of the jar to have a chunk free beverage, or stir to get all the pumpkin goodness.
To a quart jar or a 12 ounce jar, add freshly slivered ginger to taste, generally from 1 1/2 teaspoons to 1/4 cup. (I like a little less, I have friends who like much more.)
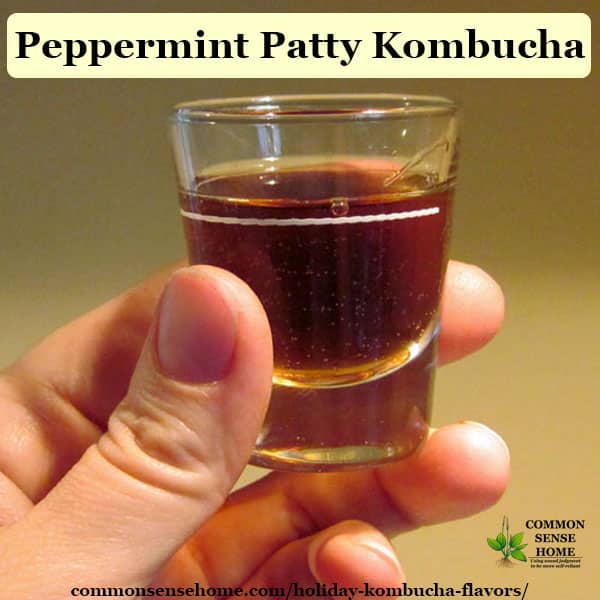
1/8 teaspoon peppermint extract
1/8 teaspoon chocolate extract *
Fill jar with plain kombucha. Serve immediately, or store for a few days (sealed) at increase carbonation.
*Note – chocolate extract may have questionable ingredients, so read the label. Alternately, you could use plain cocoa or chocolate drink mix, but those don't blend nearly as well.
To a 12 ounce bottle add:
1/4 cup apple cider
6 drops English Toffee liquid stevia
This flavor option also goes very well with almond blossom oolong tea from Frontier.
To a 12 ounce bottle add:
6 drops English Toffee flavored liquid stevia
1/8 teaspoon almond extract
To a quart jar add:
1 cinnamon stick
1/2 cup apple cider
To a 12 ounce bottle add:
1 thin cinnamon stick (the stick will swell as it absorbs moisture and large ones will be hard to get out of the bottle)
1/4 cup apple cider
To a quart jar add:
1 cinnamon stick
2 cloves
A small slice of fresh ginger
To a quart jar add:
1/4 cup dark cherry juice
Enough tart cherries to cover the bottom of the jar
Pomegranate juice and African redbush tea also pair well with cherries.
November and December are also a good time of year to get great deals on fresh citrus, so a citrus medley wraps up our holiday kombucha flavors list.
To a 12 ounce jar add:
1 tablespoon each lime, orange and lemon juice
https://www.kombucha.com/product-category/brew-booster/
Hints of pineapple, green mate, papaya, mango & more are the driving force behind our energy-giving and delectable Equatorial Energy Elixir Brew Booster™. With tropical flavors like guarana, orange, safflowers & hibiscus, it’s a great addition to your homebrewed kombucha, iced tea, sangria & other brewed beverages. And if you’re new to brewing, it’s an absolute essential to any kombucha starter kit. You want your kombucha to taste like it’s made by those big guys, right? Our Brew Booster is the way to start. And guess what? It will be BETTER than the big guys – at a fraction of the cost. You also want the probiotics and added health benefits from your homemade booch, right? We help make it delicious! The fresher the kombucha, the better the taste. Add some zest to your kombucha with our Equatorial Energy Elixir Brew Booster™!
Ingredients: Pineapple (pineapple, cane sugar, citric acid), mate green, apple pieces, papaya (papaya, cane sugar, citric acid), mango (mango, sugar, citric acid), guarana seed, natural flavor, orange slices, safflowers, hibiscus.

A delicious blend of certified organic and full-bodied mixed berries come together in our Forest Berry Bloom Brew Booster™. Ingredients like organic hibiscus, elderberries, currants, blueberries & more promise to elevate your homebrewed kombucha, iced tea, sangria & other brewed beverages. This kombucha flavor enhancer will add a delicious and refreshing sweetness to make your favorite drinks really stand out. A great addition to any kombucha starter kit, Brew Booster™ will make your homemade kombucha taste like it’s made by those big kombucha guys – at a fraction of the cost. You want the probiotics and added health benefits from your homemade booch – why not make it as delicious as possible? Capture the wonder of forest berries in a glass with our Forest Berry Bloom Brew Booster™!
Ingredients: Organic hibiscus, organic elderberries, organic currants, organic rosehip shells, natural flavor, organic marigold flowers, organic strawberry pieces, organic blueberries. Certified organic.

Capture citrus groves in a glass with our Orange Blossom Lemon Drop Brew Booster. Ingredients like orange slices, orange peels, marigold flowers & botanicals are sure to elevate your homebrewed kombucha, iced tea, sangria & other brewed beverages – and tickle your tastebuds. Hibiscus & rosehips add a depth & fullness that round out this blend. And if you’re new to brewing, it’s an absolute essential to any kombucha starter kit. You want your kombucha to taste like it’s made by those big guys, right? Our Brew Booster is the way to start. And guess what? It will be BETTER than the big guys – at a fraction of the cost. You also want the probiotics and added health benefits from your homemade booch, right? We help make it delicious! The fresher the kombucha, the better the taste. Add some zest to your kombucha with our Orange Blossom Lemon Drop Brew Booster!
Ingredients: Apple pieces, hibiscus, rosehips, orange peel, orange slices, natural flavor, marigold flowers.

Picture yourself on a beach with a delicious drink in hand made with our delicious Pure Passion Colada Brew Booster™! Tropical flavors like pineapple, mango, passion fruit, roasted coconut and more will make your homebrewed kombucha, iced tea, sangria & other brewed beverages really stand out. A great addition to any kombucha starter kit, Brew Booster™ will make your homemade kombucha taste like it’s made by those big kombucha guys – at a fraction of the cost. You want the probiotics and added health benefits from your homemade booch – why not make it as delicious as possible? Add some beach and tropical vibes to your kombucha with our Pure Passion Colada Brew Booster™!
Ingredients: Pineapple (pineapple, cane sugar, citric acid), papaya (papaya, cane sugar, citric acid), mango (mango, sugar, citric acid), natural flavor, orange slices, safflowers, roasted coconut (coconut, sugar), hibiscus, passionfruit (maltodextrin [maize], passionfruit juice concentrate, natural flavor, citric acid).

Hints of apple pieces, hibiscus, rosehips, orange peel, strawberry pieces & more come together into our refreshing and light Redberry Ambrosia Brew Booster™. Add depth and hidden flavors to your homebrewed kombucha, iced tea, sangria & other brewed beverages with this crisp and well-balanced flavor enhancer. A great addition to any kombucha starter kit, Brew Booster™ will make your homemade kombucha taste like it’s made by those big kombucha guys – at a fraction of the cost. You want the probiotics and added health benefits from your homemade booch – why not make it as delicious as possible? Add some heavenly flavors to your kombucha with our Redberry Ambrosia Brew Booster™!
Ingredients: Apple pieces, hibiscus, rosehips, orange peel, strawberry pieces, natural flavor, raspberry pieces.

Whether poolside, at the house, or at the beach, our Tropical Breeze Brew Booster™ is sure to please. Ingredients like pineapple, papaya, mango, orange slices and more promise to elevate your home brewed kombucha, iced tea, sangria & other brewed beverages. A great addition to any kombucha starter kit, Brew Booster™ will make your homemade kombucha taste like it’s made by those big kombucha guys – at a fraction of the cost. You want the probiotics and added health benefits from your homemade booch – why not make it as delicious as possible? Add some delicious tropical vibes to your kombucha with our Tropical Breeze Brew Booster™!
Ingredients: Pineapple (pineapple, cane sugar, citric acid), papaya (papaya, cane sugar, citric acid), mango (mango, sugar, citric acid), apple pieces, natural flavor, orange slices, safflowers, hibiscus.

Infuse delicious and classic wildberry flavors to your favorite brewed beverages with Wildberry Marmalade Brew Booster™. Our premium blend of hibiscus, elderberries, currants, rosehips, strawberry crispies and more will add incredible flavors and depth to your homebrewed kombucha, iced tea, sangria & other brewed beverages. A great addition to any kombucha starter kit, Brew Booster™ will make your homemade kombucha taste like it’s made by those big kombucha guys – at a fraction of the cost. You want the probiotics and added health benefits from your homemade booch – why not make it as delicious as possible? Make Grandma proud and add some amazing flavor to your brews with our Wildberry Marmalade Brew Booster™!
Ingredients: Hibiscus, elderberries, currants, rosehips, natural flavor, strawberry crispies (glucose syrup, strawberry, beet sugar, starch), mango (mango, sugar, citric acid).

https://www.kombuchahunter.com/flavor-gallery/2017/4/21/magical-matcha-mint
Magical Matcha Mint Lime
Matcha is one of those ingredients that just seems to marry effortlessly with different foods: From lattes to ice cream, smoothies, baked goods, and now... kombucha! You will definitely be able to taste that distinct sweet/earthy green tea matcha flavor in this brew, and the addition of pineapple and pink lemon will give it a juicy, soft kick! Matcha is a great detoxifier, so this is definitely a brew with benefits.

Tea Base: Sencha + Assam + Jasmine tea (5 tbsp of loose-leaf total, in equal parts of each tea, per 1 gallon of spring water)
Second ferment ingredients (per 12 oz bottle): Organic matcha powder (1 tbsp); Pineapple syrup (1/2 tbsp); Fresh mint (1 tsp); Pink aka Eureka lemon juice (to taste).
Process:
Brew your kombucha to your usual tart/sweet preference. For this batch, we used a blend of loose-leaf Sencha, Assam tea and a little bit of Jasmine tea to give the flavor a light floral note.
Grab a small mixing bowl and combine your matcha with pineapple syrup. To make the pineapple syrup, please view our recipe for Lavender syrup, here. You will simply need to replace lavender buds with mashed pineapple. The rest of the preparation and ratios stay exactly the same.
Squeeze the juice from 1/2 of a pink lemon (you can also use regular lemon if you can't get your hands on the pink variety) into a separate bowl, making sure to avoid dropping in the seeds. Add 1/2 of the lemon juice (about 1/4 tsp) into the matcha, the mint and pineapple syrup mixture, incorporate and taste. Keep adding the lemon juice in small amounts to find your preferred level of acidity.
Once you're ready to bottle, get a funnel and your bottle of choice, and begin adding the mixture via the funnel, using a teaspoon, into your bottle. You will have some of the mixture remaining on the sides of your funnel, which you will be able to wash down with the finished kombucha, once you start pouring it into your bottle, via the same funnel.
Seal tightly, label and date, and set in your kitchen cabinet for about 4 days.
The matcha will settle to the bottom of the bottle, but you can gentle swish it around when you are ready to consume it, after you've refrigerated it.
https://www.kombucha.com/free-kombucha-brew-log/


https://www.fairment.de/wissen/kombucha-wissen/jun-tee-kombucha-rezept/
Unterscheidung zum Kombucha
Auch, wenn der Herstellungsprozess ähnlich ist, gibt es doch ziemliche Unterschiede:
Jun Tee fermentiert am besten in mit Honig gesüßtem grünen Tee. Kombucha hingegen in mit Zucker gesüßtem Schwarztee.
Das Geschmacksprofil von Kombucha ist leicht säuerlicher als das von Jun Tee, der leichter daherkommt.
Die Fermentation läuft schneller als normaler Kombucha (er braucht manchmal nur 3 Tage!)
Jun Kombucha-Kulturen erzeugen seltener Abkömmlinge (Umso wertvoller ist deine Mutterkultur!)
Er fermentiert schon bei kälteren Temperaturen als normaler Kombucha (etwa 18-20 Grad Celsius), perfekt für kältere Wohnungen.
Du musst jetzt natürlich nicht frieren, wenn du Jun Tee zubereiten möchtest. Die Mikroorganismen sind auch bei 21-27°C aktiv 😉
Jun Tee hat einen höheren Alkoholgehalt als normaler Kombucha (Wenn man will, dann bis zu 5%)
Wie mache ich Jun-Tee?
Die Prozedur ist sehr ähnlich zum Kombucha. Wir zeigen Dir wie du deinen natürlichen prickelnden Champagner-Kombucha zaubern kannst.
Jun Kombucha Rezept
Während der Zweitfermentation gewinnt der Jun Tee auch die charakteristisch prickelnde Note.
Zutaten
3 Liter gefiltertes Wasser
240 ml roher Honig
24 g grüner Tee
Jun-Kultur
Jun Starter Flüssigkeit Falls nicht vorhanden geht notfalls auch Kombucha-Starterflüssigkeit
Anleitungen
Erhitze das Wasser auf ca. 74 Grad. Für grünen Tee sollte das Wasser nicht zu heiß sein, also nicht mehr kochen.
Gib den Tee ins Wasser und lasse ihn bis zu 20 Minuten ziehen.
Rühre den rohen Honig in die Flüssigkeit und lass alles abkühlen.
Als nächsten Schritt legst du den Jun Kombucha Teepilz in den mittlerweile kalten bis lauwarmen Tee.
Decke alles mit einem Tuch ab, ähnlich wie bei Kombucha, um Essigfliegen fernzuhalten. Stelle das Glas-Behältnis am besten in einen kühlen und ruhigen Raum.
Nach 3 Tagen kannst du ihn in Flaschen abfüllen und für die Zweitfermentation stehen lassen.
Lagere den fertigen Jun Kombucha im Kühlschrank.
Lass es dir schmecken!
https://culturesforhealth.com/blogs/learn/kombucha-making-jun-tea
CONVERTING A KOMBUCHA SCOBY TO UTILIZE GREEN TEA AND HONEY
As with all cultures, any changing in feeding regimen must be done with the utmost care. Use an extra SCOBY for this practice, saving others for backups which you will then feed with black tea and sugar as usual.
It is best to slowly introduce new ingredients to cultures. For that reason, it is recommended that you start by replacing 20% of the sugar and black tea with honey and green tea, respectively. Once that is successful, increase these substitutions to one-third of the ingredients.
The next steps are to increase these substitution amounts to one-half, then two-thirds, then three-quarters, and then, finally, to 100%. This slow approach should help your Kombucha SCOBY adapt to the new ingredients over time.
Each time you add more green tea and honey, check the health and vitality of the SCOBY and the fermented tea. If it is less than thriving, repeat that same level of green tea and honey until the process goes off without a hitch.
TROUBLESHOOTING TIPS FOR JUN
Keep in mind that changing the SCOBY's environment can sometimes have unpredictable impacts on the SCOBY. While the method above has been tried and tested, it is possible that it may not work with every kombucha SCOBY (this unpredictability isn't uncommon when working with living ingredients.) Use a backup SCOBY and if it fails, don't be discouraged from giving it another try.
INGREDIENTS
2 green tea teabags or 2 teaspoons loose-leaf green tea
Scant 8 cups water
½ cup raw honey
1 kombucha SCOBY converted to honey and green tea (as noted above)
½ cup Jun kombucha from a previous batch
INSTRUCTIONS FOR BREWING JUN TEA
Boil the water and add the tea.
Steep the tea for 3-5 minutes. The longer the tea steeps the stronger “green” flavor the final product will have.
Remove tea and set aside to cool to room temperature. Stick-on thermometers are an easy way to check the temperature of your liquid.
Once completely cooled, stir in the raw honey until completely dissolved.
Pour this mixture into a ½ gallon container and add the SCOBY and previously cultured Jun kombucha.
Cover the container with a cloth, coffee filter, or butter muslin secured with a rubber band or canning ring.
Allow to the culture at 70-80 ° for 4-7 days, tasting for acidity starting at day four.
Once pleasantly sour and still just a little sweet, your Jun kombucha is ready to drink!
Save 1/2 cup of your Jun kombucha then repeat steps 1 through 8 to start a new batch.
JUN TEA SECOND FERMENTATION
For a second fermentation, decant the finished Jun into airtight bottles and add fruit or juice. Allow this to culture for 1-3 days at room temperature before refrigerating.
Jun is generally more carbonated than kombucha so just be extra careful to check for carbonation and avoid prolonged second fermentation periods when temperatures are warm.
https://www.fairment.de/wissen/kefir/kefir-tipps/
Hier sind unsere Top Kefir Tipps für richtige Experten!
1. Spülmittel
Achte darauf, dass keine Rückstände vom Spülmittel im Glas sind. Für die Milchkefirkultur können solche Rückstände tödlich sein.
2. Die richtige Milch
Du solltest immer Bio-Milch, Milch von Weiderindern, Alpenmilch oder Heumilch verwenden. Diese Milch enthält mehr Nährstoffe und tendenziell weniger Toxine und Antibiotika.
3. Vermeide homogenisierte Milch
Milch, die ultrahocherhitzt oder homogenisiert wurde, solltest du meiden. Dies schadet den Mikroorganismen und kann Probleme bei der Fermentation bereiten. Wenn möglich, verwende Frischmilch.
4. Anaerobe Gärung
Schraube den Deckel nur locker auf dein Fermentationsglas. Ein bisschen Gas sollte entweichen können. Gleichzeitig darf so wenig frische Luft wie möglich an den Kefir kommen. Es handelt sich um eine Gärung ohne Sauerstoff (anaerob).
5. Pflege der Bakterienkultur
Wasche die Milchkefir-Knöllchen nicht unter fließendem Wasser. Es können dabei gute Hefen und Bakterienkulturen abgewaschen werden, die wichtig sind. So könnte die Flora des Milchkefirs in eine Disbalance geraten. Der Milchkefir wird zwar nicht sterben, jedoch kann es ein paar Braudurchgänge dauern, bis der Kefir wieder genau so schmeckt, wie er schmecken soll.
6. Formen der Gärung
Es gibt 2 Formen der Milchkefir-Gärung:
Gärung bei hoher Temperatur (20-28° Celsius): Hierbei sind bessere Umweltfaktoren für die Bakterien, als für die Hefen gegeben. In diesem Fall trennt sich die Molke (die Wasser-ähnliche Flüssigkeit, die sich unten absetzt) schneller vom Quark (die weiße, cremige Masse mit fester Konsistenz, die sich oben absetzt). Der Kefir hat ein saureres Aroma.
Gärung bei niedriger Temperatur (8-18° Celsius): Hierbei sind bessere Umweltfaktoren für die Hefen als für die Bakterien gegeben. In diesem Fall entsteht mehr Kohlensäure und der Kefir schmeckt milder (weniger sauer). Es entsteht dabei etwas mehr Alkohol. Der Alkohol kann bis zu 1% erreichen.
7. Kohlensäure
Hat sich sehr viel Kohlensäure gebildet, so beeinträchtigt dies die Aktivität der Hefen. Soll die Fermentation fortgeführt werden, ist es ratsam, das CO2 entweichen zu lassen (z.B. mit einem Tuch das Getränk atmen lassen).
8. Konsistenz
Verwende Sahne, Milchpulver oder verlängere die Fermentationsdauer, um eine festere cremigere Konsitsenz zu bekommen.
9. Mindestgärzeit 16 Stunden
Die Mindestgärzeit der Kultur beträgt 16 Stunden. Die Fermentation kann auch durch einen Wechsel der Temperatur während des Gärprozesses beschleunigt werden, indem du die Kultur beispielsweise zuerst wärmer fermentieren lässt, und dann noch mal im Kühlschrank. Eine ideale Gärdauer mit einer Starterkultur von 30g Milchkefir-Knöllchen pro Liter Milch beträgt 24-36 Stunden.
10. Füllmenge
Ein Gefäß mit Milchkefirknollen und frischer Milch sollte nie höher als ⅔ gefüllt werden. Das Getränk kann sich ausbreiten und Druck aufbauen. Die Gefahr besteht, dass der Deckel durch den entstehenden Druck abgesprengt wird.
11. Gärung beschleunigen
Rühren während der Fermentation kann die Gärung beschleunigen. Die Milchkefirknollen können mehr ihrer Oberfläche dem Milchzucker aussetzen, den sie als Nahrung benötigen. Rühren ist jedoch nicht zwingend notwendig.
12. Der Geschmack
Der Kefir schmeckt nicht? Keine Angst! Es kann sein, dass die ersten 2 Chargen nicht so schmecken, wie erwartet. Die fairment Kefirknöllchen wurden durch den Versand per Post womöglich beeinträchtigt. Die Balance von Hefen und Bakterien kann aus dem Gleichgewicht gekommen sein. Bekommt der Milchkefir wieder neue Nahrung in Form von Milch, pendelt sich diese Balance automatisch ein.
13. Knollenmenge
Das Verhältnis Knollen zu Milch sollte ⅕ nicht überschreiten. Ein anderes Verhältnis kann die Milchkefirknollen stressen und so ihr natürliches Gleichgewicht stören.
14. Haltbarkeit
Hat Dein Milchkefir 12-24 Stunden bei Zimmertemperatur gestanden, kannst Du ihn in den Kühlschrank stellen und dort bis zu einem halben Jahr aufbewahren. Willst Du neuen Milchkefir ansetzen? Dann entferne alles davon, bis auf die Milchkefirknollen. Da die Hefe auch im Kühlschrank noch weiterhin etwas aktiv ist, entlüfte die Flaschen im Kühlschrank wöchentlich (kurz öffnen, CO2 entweichen lassen, und wieder schließen).
https://www.fairment.de/wissen/kefir/kefir-moeglichkeiten/
10 Möglichkeiten, was Du mit Kefir machen kannst
1. Milchkefir als Getränk
Milchkefir, Fermentation, Kefir
Kefir ist ein prickelndes, süß-säuerliches, cremiges und erfrischendes Milchprodukt. Es enthält zudem lebendige Mikroorganismen. Du kannst ihn pur genießen oder mit Früchten mixen.
2. Kefirbutter
Wenn Du gerne Deine Butter aufwerten möchtest, kannst Du sie vorsichtig schmelzen und mit ein wenig Kefir vermischen. Dadurch wird sie saurer und es ergibt sich eine säuerlichere Butter.
3. Saure Kefirsahne
Was, wenn Du Deine eigene saure Sahne herstellen kannst, und zwar aus Kefir? Verwende dazu eine Mischung aus Milch und Sahne im Verhältnis 1:1, um Deinen Milchkefir herzustellen. Lasse ihn etwas länger fermentieren, um eine schöne Säurenote zu bekommen, und Du bekommst Deine eigene saure Kefirsahne!
Auf dem fairment Kulturkanal zeigt dir Lisa wie du Kefirsahne selber machst. Schau vorbei und abonniere den YouTube Kanal für mehr Wissen, Rezepte und Inspiration
4. Kefirfrischkäse
Kefirfrischkäse kannst Du im Grunde sehr einfach selbst herstellen, indem Du dafür sorgst, dass sich der Kefir von der Molke trennt. Lass dazu den Kefir etwas länger fermentieren und achte auf eine leicht erhöhte Temperatur während der Fermentation.
Den fertigen Kefir trennst Du von den Milchkefir Knöllchen und erhitzt ihn auf dem Herd ein wenig. Eine Temperatur von 40 °C ist ideal. Warte so lange, bis sich die Molke (durchsichtig) vom Rest trennt. Die Molke kippst Du weg oder trinkst sie, den Rest kannst Du bereits als Kefirfrischkäse verwenden.
5. Milchkefir Dressing
Kefir Dressing, Milchkefir, fairment
Milchkefir ist süß-säuerlich, cremig und mit einem leichten Fettgehalt. Du kannst ihn also auch als Salatdressing verwenden. Entweder pur oder in Verbindung mit etwas Honig und Olivenöl, Salz und Pfeffer.
6. Milchkefir als Dip
Lasse ihn etwas länger fermentieren oder mische ihn mit etwas Naturjoghurt oder Quark, gib ein wenig Olivenöl, Salz und Pfeffer darauf, und fertig ist der Dip!
7. Ersatz für Buttermilch
Immer, wenn ein Rezept nach Buttermilch verlangt, kannst Du dafür Milchkefir als Ersatz nehmen.
8. Shakes & Smoothies
Dies ist eine Möglichkeit, Shakes und Smoothies lebendiger zu gestalten und sie geschmacklich aufzuwerten. Probier unseren probiotischen Mango-Lassi.
9. Für die Haut
Als fertigen Milchkefir oder püriert mit den Milchkefir-Knöllchen kannst Du ihn zur Behandlung von Sonnenbrand anwenden.
10. Ballaststoffquelle
Besonders die Kefirknöllchen kannst Du pur essen. Wenn Du die Konsistenz nicht magst, empfehlen wir Dir, die Knöllchen zu pürieren und so zu trinken.
https://www.fairment.de/wissen/kefir/kefir-alltagsrezepte/
Wie Du Kefir in Alltagsrezepten verwendest
Im Folgenden erfährst Du ein paar stichfeste Vorschläge für ein paar Kefir Alltagsrezepte:
Verwende ihn als Buttermilch-Ersatz in Rezepten. Dazu gehören neben Pfannkuchen auch Smoothies, kalte Suppen, Müsli und Salat-Dressings.
Nutze Kefir, um Getreide oder Mehl über Nacht einzuweichen, bevor Du damit kochst oder bäckst. Die Mikroorganismen machen das Getreide bekömmlicher, da sie es quasi „vorverdauen“ und sie Deinen Verdauungsapparat nicht so stark belasten.
Verwende Kefir als Salatdressing. Prinzipiell kannst Du ihn pur als Salatdressing verwenden, da er sowohl Säure als auch Fett enthält, um die wertvollen fettlöslichen Vitamine aus dem Gemüse aufzunehmen.
Kefir als Marinade? Aber hallo! Milchkefir kann Fleisch zart machen und ihm Aroma verleihen – denke nur an die ganzen Aromastoffe, die bei der Kefir-Fermentation entstehen! Denkbar ist auch, Fleisch kurz in Kefir zu „dippen“, bevor Du es brätst.
Verwende Kefir in gefrorenen Rezepten. Er eignet sich als Alternative zu Milch, wenn Du Eis, Popsicles oder Smoothies machen möchtest. Dies ist besonders empfehlenswert, da Milchkefir ein Upgrade im Vergleich zur Milch darstellt – mehr Nährstoffe, weniger Laktose, einfachere Verdauung!
Du willst Sauerteig machen? Probiere mal Kefir, um den Sauerteig anzusetzen! Er enthält genau die Bakterien und Hefen, die in normalem Sauerteig zu finden sind (überwiegend), und bedeutet ein schnelleres „Gehen“ des Sauerteigs!
Kefir als Wundbehandlung: Es gibt wissenschaftliche Untersuchungen die andeuten, dass Kefir bei Verletzungen der Haut (Infektionen, Schnitt- und Brandwunden) eine Art Naturmedizin darstellt. Dazu Kefir auf betroffene Hautstellen auftragen und mit einem Verband fixieren.
Kefir bei Sonnenbrand? Na klar! Wenn Joghurt funktioniert, dann wohl auch Kefir, oder? 🙂
Kefir als Shampoo: Klingt komisch, funktioniert aber! Gib 100ml Kefir auf Deine nassen Haare, verreibe ihn kurz, lass ihn 3-5 Minuten einwirken wenn möglich, und spüle ihn dann wieder aus. Du wirst überrascht sein, wie sauber Deine Haare (egal ob kurz oder lang) danach sind!
https://myfermentedfoods.com/kefir-second-fermentation/
How to Second Ferment and Flavor Milk Kefir
What is Kefir Second Fermentation
The first fermentation happens when milk kefir grains are added to milk and cultured between 12-24 hours depending on if milk is kept in the fridge or on the room temperature.
Once the grains are removed we are left with milk kefir. Milk kefir can be further cultured and flavored depending on the preference.
The culturing process is called the second fermentation. For everyone that is lactose intolerant second fermentation is great as it will reduce the lactose contents.
The lactose content drops because bacteria feeds from the lactose. With the second fermentation the nutrient value increases and it provides a base to create new flavours.
The Best Way to Second Ferment Your Kefir
Before we begin, let us first have a look at the two important facts related to second fermentation:
The second fermentation occurs by the action of the bacteria that have colonized the kefir and are floating freely. This means you do not need to add kefir grains for the second fermentation.
The second fermentation is an anaerobic process that can continue even in the absence of oxygen. Hence, there is no need to cover the fermentation jar with a cloth to allow air to enter to support the process. In fact, you need to close the jar tightly clamping down the lid on the vessel.
Now let us have a look at the step-by-step process of the second fermentation of kefir.
Step 1: Remove kefir grains from kefir milk you have prepared using a strainer.
Step 2: Pour the kefir into a large glass jar with a tight lid. It is advisable to use the clamp-down bottling jars as the tighter lids of these jars can allow the second fermentation to occur at a faster rate without letting carbonation to escape. If you do not have a clamp-down bottling jar, you may use a normal canning jar.
Step 3: You can add flavorings of your choice such as small chunks of fruits, spices, herbs, or juice. You can skip this step if you prefer the plain taste.
Adding flavors enhances the taste of the second fermented kefir and improves its health benefits by infusing it with the nutrients in the form of flavoring agents.
Step 4: Seal the jar tightly and leave it to stand for the fermentation process to continue. It may take up about 24 and 48 hours for the carbonation to build up in the jar.
You can check the contents and taste it once in 2 to 3 hours to keep tabs on when it has fermented as desired. You can stop the second fermentation at any time you feel there is an adequate build-up of carbonation and the sour taste has reduced to your liking.
Step 5: Once you feel the second fermentation is done, pour the contents in any regular glass bottle or jar and refrigerate. In case, you have added flavorings, you may remove them by hand or using a strainer.
If you prefer, you can leave them in the kefir, especially if they were added in tiny bits and pieces and you plan to consume kefir in a reasonable time period.
Alternatively, you can refrigerate the kefir or make it in the fridge itself as given below:
Refrigerating Kefir
If you do not prefer to second ferment your kefir fully, you can pour it into a glass bottle after removing the grains and place it in the fridge. Milk kefir, when placed in the cooler temperature, still ferments, though at a slower rate.
The refrigerated kefir is creamier and develops a mellow flavor over 3 to 4 days. It also tastes sweeter. Hence, if you would like your second ferment to be less sour and more sweet and creamier, you can try this method by letting the kefir ferment in the refrigerator itself.
Fermenting Kefir in the Refrigerator
If you want your second fermented kefir to have less tart and yeasty flavors and be far creamier, you can make kefir in the refrigerator by adding kefir grains to fresh milk. Begin with stashing the container in your fridge to get your regular kefir. It may take about 5 to 7 days to ferment kefir in the fridge.
Later, you can remove kefir grains and place the kefir in the fridge again for the second fermentation. This method will give you more mellow tasting kefir.
How Long is the Second Fermentation of Milk Kefir
Usually, it takes about 24 to 48 hours for the second fermentation to occur. However, it depends entirely on you when you want to stop the process. It is best to taste your kefir frequently during the second fermentation to get an idea of how the sourness and flavors are changing over time.
If you like your kefir to have a less sour taste, you can allow it to ferment for a longer duration.
Also, if you want to delay the process of the second fermentation, you can place the kefir milk in the refrigerator. It may take a longer duration if the climate is colder. In a hot climate, the second fermentation can occur in just 8 to 12 hours.
Benefits of a Second Fermentation
Kefir itself is known to provide a number of health benefits that are primarily attributed to the rich probiotics present in it. The process of second fermentation further enhances the probiotic nature of the drink making it an even healthier option.
The second fermentation mellows the flavor as it takes away sharp acid from the milk. Ensure kefir is kept in a jar with lid with no space for air to come in.
By adding spices and flavorings, you can ensure you have a spicy, sweet, or savory drink at your disposal to please your taste buds.
Let’s take a look at the numerous benefits you could enjoy by second fermenting kefir.
Improves Nutritional Profile
The process of secondary fermentation increases the nutritional content of kefir and even enhances the probiotic bacteria present in it.
Probiotic Bacteria: The process of second fermentation allows bacteria to grow and multiply in kefir thus making it richer in terms of its probiotic nature. The probiotics in kefir help to support the functions of the digestive organs such as stomach and intestines by improving the gut flora.
It could provide relief from acute and chronic digestive troubles like constipation, abdominal pain, bloating, and indigestion.
Vitamin Bs: Kefir contains vitamin Bs such as thiamine, riboflavin, niacin, and biotin. These vitamins can support the ability of your intestines to absorb other nutrients thereby making more vitamins and minerals available to your body to function optimally.
Vitamin Bs also support nerve functions and provide relief from neurological symptoms such as tingling and numbness.
Calcium: The calcium content of milk increases during the process of second fermentation. It is known that calcium is an essential nutrient for maintaining the health of bones and teeth.
Drinking second fermented kefir regularly could make your bones and teeth stronger and reduce the risk of bone fractures, and cavities and caries in the teeth.
Magnesium: The higher magnesium content of the secondary ferment could enable you to avoid sleep disturbances. It can also boost the body’s metabolic processes and improve the breakdown and assimilation of food.
Reduces Lactose
One of the best health benefits of second fermentation is that this process reduces the lactose content in kefir. This effect is of great advantage for people who suffer from lactose intolerance.
The second fermentation allows bacteria to use up all sugars in kefir present in the form of lactose thereby making it lactose-free and so, safer to consume.
Hence, patients with lactose intolerance can drink second fermentation kefir without the risk of developing adverse effects.
It is important to note here that the lactose in kefir is lower when the second fermentation is allowed to occur for a longer duration.
Reduces Sourness
Usually, any food tends to become sourer when it is left to ferment for a longer duration. But, kefir is an exception.
It may sound strange! But, it’s a fact that second fermentation actually makes kefir less sour.
Letting your milk kefir undergo the process of second fermentation can drop its sourness by smoothing out its aggressive tartness.
Creamier Kefir
When you leave milk kefir to undergo secondary fermentation, it becomes thicker and creamier. Most people love the rich, creamy taste of the second fermented kefir.
The consistency also indicates increased carbonation and reduced sugar content as the sugars in kefir get used up during the process.
Opportunity to Add in Flavorings
The second fermentation provides you the perfect opportunity to enhance the flavors of your kefir. You can change the flavors of kefir by adding practically any spices or fruits of your choice.
Also, since the process of fermentation continues in the second ferment, whatever flavoring ingredients you add would be incorporated into the contents making the flavor profile more complex.
Since the method of second fermentation involves removing kefir grains first, it prevents the risk of contamination of the grains by any foreign substance. This means your precious kefir grains would still be safe and reusable.
Increases Carbonation
Secondary fermentation increases the carbonation levels in the kefir. Since the process of second fermentation is carried out in a jar with its lid clamped down or screwed on, the build-up of carbonation is trapped within the jar. It makes your kefir fizzier and more refreshing.
You will love the tingling sensation the excess carbonation leaves on your taste buds for long after you have had a glass of twice fermented kefir.
Second Fermentation of Kefir Flavors
The second fermentation is the perfect time for you to experiment with the flavoring of your kefir. Here are some great flavoring options you can try during second fermentation.
Sweet Flavors
You can add chunks of fruits to kefir to make it sweetish. You can also add other natural sweeteners such as honey, dates, molasses, Maple syrup, or Agave syrup.
The additional sucrose from the fruits or sweeteners encourages the fermentation process by providing more food for the bacteria to survive.
Some really good options of fruits you can add during second fermentation include:
Apple
Berries such as Raspberries, Strawberries, Blueberries, and Blackberries
Pineapple
Citrus fruits
Guava
Cherries
Banana
Mango
Grapes
Spices like sticks of cinnamon, nutmeg, and cloves can also be added in small quantities in addition to the fruits to enhance the flavors further.
You can also use a combination of fruits, spices, and natural sweeteners to create your own complex yet unique flavors.
Savory Flavors
If you plan to use kefir as dips or dressings, you can flavor them with veggies and herbs such as onion, garlic, basil, thyme, chives, parsley, and rosemary.
Tea Flavored Kefir
You can infuse your kefir with tea to enhance its flavors. Usually, teas are added to thin water kefir to make it more flavorful and thicker.
When using tea for flavoring kefir during secondary fermentation, use tea bags. If the tea is loose, you can place it on a piece of cloth and make a bundle. Tie its upper end with a cotton thread or string. Dip this bundle into your kefir.
The secondary fermentation draws out the rich aroma and flavors of the tea, the end result of which could be a highly refreshing and pleasant drink. You can use herbal teas such as green tea, mint, lemon balm, apple mint, lemongrass, and chamomile for flavoring kefir.
How to Store the Second Fermentation of Kefir
Once you feel the secondary fermentation is done to the extent you desire, you can bottle up the contents and store them in the refrigerator.
You may remove the flavorings or leave them within the bottle. If you leave the flavoring agents in the bottle, the flavors continue to infuse into kefir, though very slowly.
If you have added fruit chunks, they may become too soft and even unappetizing over time. Hence, if you plan to store the kefir for more than a week, it is best to remove the flavorings.
An infusion is basically a tea, and in dairy ferments, we make a “milk tea” with various herbs and spices to add flavor to our creations. It’s most efficient to infuse a portion of the total milk used with the flavoring and then add the infused milk to the rest of the milk. Add the infused milk just before incubation, at about the same time as you add the culture. You can strain the infusion and just add the flavored milk, but if the ingredient you steeped is small and has a pleasant texture (like softened rosemary or lavender), you can add it as well. Here are some infusions I really like; the proportions assume that you will be using the infusion in a ferment of about 1 quart (4 cups) of milk.
COFFEE OR TEA. Heat 1 cup of milk until it just simmers. Turn off the heat and add 1 to 2 tablespoons of ground coffee or tea leaves (any type of tea you enjoy). Stir, cover, and let infuse for 10 minutes. Strain through
a fine-mesh strainer or cheesecloth. Coffee and tea infusions are great with chocolateand amaretto-flavored dairy ferments. If you are a tea lover, you can do what my husband does and simply pour a bit of kefir into your steeped tea!
CARDAMOM PODS, CINNAMON
STICK, NUTMEG, OR ALLSPICE. Use these spices in combination or individually to flavor yogurt. Heat 1 cup of milk until it just simmers. Turn off the heat and add 2 teaspoons of slightly crushed whole spices (to crush the spices, use a mortar and pestle or a cocktail muddler, or put them in a ziplock bag and crush them with a rolling pin). Stir, cover, and let infuse for 10 minutes. Strain through a fine-mesh strainer or cheesecloth.
CHAI SPICE BLEND. Heat 1 cup of milk until it just simmers. Turn off the heat and add half of a cinnamon stick, four cloves, and two crushed cardamom pods (you can vary the amounts according to what you like). Stir, cover, and let steep for 10 minutes. Strain and add to the rest of the milk for your ferment. If you like, try adding black tea leaves to the spice mix.
LEMONGRASS. Found in many Thai
dishes, lemongrass is a subtle herb that lends itself to both sweet and savory dishes. You can find it in segments or whole, fresh or frozen, in most Asian grocery stores and sometimes even in higher-end natural foods stores. You can also find it dried, but as with many herbs, the dried version is a pale representation of the herb’s flavor. To infuse milk with lemongrass, first slice or chop four 1- to 2-inch segments. Bring 1 to 2 cups of milk to a boil, then add the sliced or chopped lemongrass. Turn off the heat, cover, and let stand for 1 hour. Strain and add to the rest of the milk for your ferment.
Fruit and veggie purées make wonderful additions to yogurt, adding fiber, flavor, nutrients, and color. As with most flavorings, you are limited only by your imagination — and possibly the produce section at your local grocery store. Purées should be smooth, close to baby food in texture, with minimal chunks so that they don’t separate in the yogurt. Following are some of my favorite fruit and vegetable mixtures. They will flavor 1 to 2 quarts
of yogurt or kefir. Put all of the ingredients in a blender or food processor and purée until smooth. Mix with the milk just before adding the culture or after incubation and/or draining. If adding a purée makes your drinkable yogurt too thick, just add milk to thin the mixture.
Mango, Banana, and Lime
This recipe comes courtesy of New England Cheesemaking Supply Company.
½–1 whole mango ½–1
whole ripe banana
2 teaspoons honey Juice of 1 lime or 1 teaspoon grated lime zest (for thicker results)
Mixed Berries and Roasted Beets
½ cup roasted cubed beets (regular or Chioggia)
½ cup fresh or frozen mixed berries (blueberries, raspberries, blackberries, strawberries, and so on)
2
1 tablespoon grated orange zest teaspoons honey
Carrot, Ginger, Cinnamon, and Orange
1 cup cubed and cooked carrot or winter squash
2
1 tablespoon grated orange zest teaspoons honey
½ ¼
teaspoon ground cinnamon teaspoon ground ginger
Indian Shrikhand This is a classic Indian flavoring mixture usually combined with drained yogurt (chakka).
1 cup mashed banana or guava, or combination
2–4 ¼
tablespoons honey or another sweetener teaspoon ground cardamom
Pinch of salt Tiny pinch of saffron stamens
Chunks of fresh fruit, jam, or marmalade can be stirred into any dairy ferment before or after incubation. When added earlier in the process, the fruit chunks tend to settle to the bottom, but this can be a beautiful fruit-at-the-bottom or sundae-style presentation in a glass and fun to eat as well. Use ½ to 1 cup of unsweetened fruit or about ¼ cup of sweet preserves per quart of milk, or to taste.
Traditional koumiss is a slightly boozy, nutritious beverage of fermented mare’s milk; it is often fondly referred to as milk champagne. For our recipe, we’ll use cow’s or goat’s milk and shoot for a mild version. By using low-fat milk with added sugar, along with added bacteria and yeast (from kefir or kefir culture), we can come pretty close to the traditional product. There’s quite a bit of wiggle room for experimenting with the ratio of water to milk and sugar. A bit more water will help prevent clumping, but you might need to add more sugar if you increase the water amount. I have played around with using yogurt culture and adding champagne yeast, which worked well and gave the finished product a nice yogurt flavor. Whatever you do, be sure to wrap the bottles in a towel when you agitate them, just in case the pressure exceeds the strength of the glass.
Makes 1 quart
INGREDIENTS
1 quart skim milk
1 cup water
2 teaspoons sugar
⅛ teaspoon powdered kefir culture or ⅛ cup fresh kefir
STEPS 1. Pour the milk into a pan and gently heat on the stove to 195°F (91°C), stirring occasionally. Hold it at 195°F (91°C) for 5 minutes.
2. Remove from the heat, add the water and sugar, and let cool to 80°F (27°C).
3. Add the culture. If using powdered culture, sprinkle it on top of the milk and let sit for 1 minute, then whisk it in. If using fresh kefir, combine the kefir with ¼ cup of the warm milk in a small bowl and whisk until smooth, then add the mixture to the rest of the milk.
4. Incubate at warm room temperature (70°F to 80°F/21°C to 27°C) for 6 to 8 hours.
5. Cool to between 65°F and 68°F (18°C and 20°C) by setting the incubation container in a bowl or sink full of cool water and stirring. Hold the temperature between 65°F and 68°F (18°C and 20°C) for 2 hours, stirring every 30 minutes.
6. Bottle in plastic water bottles or shatterproof, stoppered glass bottles (such as for beer or kombucha) and let cool to 40°F (4°C). Age in the refrigerator for 1 to 3 days, or longer. Before serving, gently agitate the bottles to break up any clumps, then let sit in the fridge for 10 to 20 minutes to let any excess carbonation recede or you may lose a good portion of the contents to foaming when you open it!
Hand-churned butter is a true delight, both in its simplicity and in its
epicurean enchantment. Butter is made by warming cream to room temperature and then agitating it. When warm, the fat globules in the cream soften. When the agitation causes them to smash into each other, they will stick together, eventually forming a mass of butter and leaving behind a low-fat liquid — the buttermilk.
This recipe calls for adding kefir or yogurt cultures to the cream to make cultured butter. Cultured butter is only slightly tangy and has wonderful layers of flavor, depending on the variety of starter bacteria used. If you are using a yogurt culture, choose one that doesn’t create very viscous results, as these are much harder to agitate properly. If you are using kefir grains, use light cream or even half-and-half instead of heavy cream — it will be much easier to remove the grains from one of these thinner liquids. You don’t need a butter churn to make butter; a glass quart jar will do just fine.
Makes about 1 cup
INGREDIENTS
2 cups cream (heavy or light)
⅛ teaspoon yogurt or kefir culture, ⅛ cup fresh yogurt or cultured kefir, or 2 tablespoons kefir grains
¼ teaspoon salt (optional)
Seasonings to taste, such as herbes de Provence, tarragon, saffron, smoked salt, or roasted garlic (optional)
STEPS
1. Pour the cream into a glass quart jar or butter churn. Add the culture and stir to mix it in.
2. If you are using yogurt culture, incubate at 110°F (43°C) for 4 to 6 hours, then cool to 68°F to 72°F (20°C to 22°C). If you are using kefir culture, incubate at 68°F to 72°F (20°C to 22°C) for 18 hours.
3. Shake the jar or churn the butter until the butter and buttermilk separate. If you are shaking a jar, be sure not to overwarm the cream by holding the jar portion in your warm hands. Instead, grip the lid portion and shake the jar sharply up and down. This step could take anywhere from a few seconds to 10 minutes, depending on your technique and the amount of fat in the cream.
4. Drain off the buttermilk. You can save it for drinking or use it to make delicious biscuits, pancakes, and waffles. Prepare a large bowl of ice water.
5. Remove the glob of wet butter from the jar or churn and place it in a medium bowl. Set the bowl in the bowl of ice water and, using a large spoon, work the butter with the back of the spoon, gently pressing out and draining excess moisture.
7. Work the butter a bit longer, or use a butter press to remove as much moisture as possible. The less moisture in the butter, the longer its shelf life, the better its texture when frozen, and the less likely it will be to splatter when cooking.
8. Press the butter into a butter bell or tub. If you have used a butter press, then the formed butter can be wrapped in parchment or waxed paper. Depending on how much moisture is in the butter, it should keep for many weeks, or even months, in the refrigerator, and indefinitely in the freezer
The word ricotta literally means “re-cooked.” Cheesemaking produces a lot of whey (up to 90 percent of the original milk volume), which contains a lot of whey proteins. When that slightly acidic whey is heated to 180ºF (82ºC) or a bit higher, those proteins spontaneously curdle and float to the top. The traditional ricotta maker then scoops out those curds and drains them. In this way, traditional ricotta is a by-product of making Italian cheeses such as mozzarella. We’ll use plain kefir or yogurt as the acid source to curdle hot milk. The resulting ricotta is much more interesting than whole-milk ricotta, thanks to the flavor of the kefir or yogurt. This is a great use for older yogurt or kefir that is not only more acidic and will curdle the milk more readily but that has already lost a good deal of its probiotic potential. You’ll need cheesecloth for this recipe.
Makes about 2 cups
INGREDIENTS
4 cups milk #
2 cups yogurt or kefir (cultured or from grains)
¼–½ teaspoon salt (optional)
STEPS
1. Pour the milk into a large stainless-steel pot and set it over medium-high heat. Heat to boiling, constantly scraping the bottom with a spatula so the milk doesn’t stick and scorch. Cool to about 195°F (91°C).
2. Gently stir in the yogurt or kefir. You will see the curds form instantly, and the clear whey will begin to separate.
3. Line a colander with cheesecloth and place it over the sink or another pot. Scoop, ladle, or pour the hot whey and curd into the colander. Let the curd drain for about 10 minutes, or until it reaches the desired texture. Every few minutes, gently lift two sides of the cloth and tip the curd back and forth to encourage draining.
4. Mix in the salt, if using, then transfer the curd to a container and cool in the refrigerator. Use within 1 week or freeze.
Crème fraîche is simply sour cream’s more decadent cousin. The
fat content of sour cream is regulated in the United States to about 18 percent, while the fat content of crème fraîche can vary but is usually closer to that of light cream (20 percent). I make mine with heavy whipping cream (about 37 percent fat) and have no regrets! This recipe is great for desserts of all kinds.
The whipping process demonstrates the amazing effect that temperature has on the milk fat globule. Since the cream is agitated when cold, the fat globules will not stick together (as opposed to when you make butter with warm cream). Instead, air is incorporated into the cream, doubling the volume and creating whipped cream. Cultured heavy cream usually whips into a very thick product. If you don’t want it that thick, use a lighter cream or add about ¼ cup milk to the heavy cream.
Makes 2 cups
INGREDIENTS
2 cups cream (heavy or light)
⅛ teaspoon powdered yogurt or kefir culture or ⅛ cup fresh yogurt or cultured kefir
¼ teaspoon salt (optional)
2 teaspoons sugar or maple syrup (optional)
STEPS
1. Pour the cream into a glass quart jar. Add the culture and stir to mix it in.
2. If you are using yogurt culture, incubate at 110°F (43°C) for 1 to 2 hours, then cool to 68°F to 72°F (20°C to 22°C). If you are using kefir culture, incubate at 68°F to 72°F (20°C to 22°C) for 4 to 8 hours.
3. Place the cultured cream in the refrigerator or in an ice water bath until cold, between 35°F and 40°F (2°C and 4°C).
4. Pour the cultured cream into a bowl. Mix in the salt and sugar, if using. Using a whisk or a hand mixer, beat until stiff peaks form. The whipped crème fraîche will keep in the refrigerator, without losing its t exture, for several days.
Commercial sour cream is made from milk that contains about 18 percent butterfat (for comparison, half-and-half is about 12 percent butterfat, light cream about 20 percent, and whipping or heavy cream 35 to 38 percent). For this recipe, I prefer using half-and-half to create an incredibly rich and thick sour cream. Many commercial sour creams include quite an array of additives, from thickeners to flavoring agents. You’ll be amazed at how easy, and superior, this sour cream is! Whether to use yogurt or kefir culture will depend simply on which cultures you have and how much time you have. The yogurt version is much faster. If you use kefir grains, note that they are a bit of a challenge to fish out of the thickened cream. This is our go-to sour cream now, and we get probiotics with every rich dollop.
Makes 1 quart
INGREDIENTS
1 quart half-and-half
⅛ teaspoon yogurt or kefir culture, ⅛ cup fresh yogurt or cultured kefir, or 2 tablespoons kefir grains
STEPS
1. Pour the half-and-half into a glass quart jar. Add the culture and stir to mix it in.
2. If you are using yogurt culture, incubate at 110°F (43°C) for 8 to 12 hours, then cool to between 68°F and 72°F (20°C and 22°C) and hold the cream there for 4 to 6 hours longer. If you are using kefir culture, incubate at about 75°F (24°C) for 24 hours. Chill before serving. Store the sour cream in the refrigerator; it will remain fresh tasting for 2 to 3 weeks.
If you want to start making more complex cheeses, feta is a great place to start. It can be enjoyed fresh or aged in the refrigerator, and it takes very few supplies to make it. Whether or not it is due to my Greek heritage and childhood of enjoying feta I can’t say, but I am picky about feta. Most commercial American feta is not made with the craftsmanship the cheese deserves. Once you get comfortable with this recipe, set a batch aside for aging and see the marvelous wonders that time can work on cheese. You’ll need a thermometer, cheesecloth, and a long knife for this recipe.
Makes 1½–2 pounds
INGREDIENTS
2 gallons whole milk
¼ teaspoon powdered yogurt or kefir culture or ¼ cup fresh yogurt or kefir
⅛ teaspoon calcium chloride diluted in 2 tablespoons cool water (optional; suggested for store-bought, homogenized milk)
⅛ teaspoon double-strength or ¼ teaspoon single-strength rennet diluted just before use in ¼ cup cool, nonchlorinated water
2 tablespoons pure salt (such as sea salt or any noniodized salt with no added anticaking agents)
STEPS
1. Pour the milk into a large pot and place that pot inside a larger pot. Fill the larger pot with enough water to come up the sides of the inner pot. Set over low to medium heat and warm the milk to between 88°F and 90°F (31°C and 32°C). The water in the outer pot will be hotter than the milk, so either turn the heat off before the milk reaches its goal or be ready to remove the milk pot from the water bath.
2. Add the culture. If using powdered culture, sprinkle it on top of the milk and let sit for 3 to 5 minutes, then stir gently for 2 to 5 minutes. If using
fresh yogurt or kefir, combine the yogurt or kefir with ½ cup of the warm milk in a small bowl and whisk, then add the mixture to the rest of the milk.
3. If you are using yogurt culture, incuba te at 105°F (41°C), stirring
occasionally, for 1 hour. If you are using kefir culture, incubate at 88°F to 90°F (31°C to 32°C), stirring occasionally, for 1 hour. You can usually ac complish this by covering
the milk pot and letting it sit in the water bath. Stir in the diluted calcium chloride, if using.
4. Using a slotted spoon or cheese ladle, stir the milk using an up-and-down motion for a few strokes. Hold the ladle over the milk and pour the diluted rennet over it and into the milk. Stir for 1 minute longer, then hold the ladle to the top of the milk in several spots to help still the milk.
5. Cover the pot and let sit undisturbed until a clean break is achieved; that will be 25 to 30 minutes if you are using yogurt culture and about 45 minutes if you are using kefir culture.
7. Gently stir the curds just enough to move them slowly in the pot. Check the temperature. If the yogurt-cultured mixture is not 105°F to 110°F (41°C to 43°C) or if the kefir-cultured mixture is not 88°F to 90° (31°C to 32°C), return the pot in its hot water bath setup to the stovetop and reheat to that temperature. Continue to stir for a total of 20 minutes. The curds will shrink and firm up a bit during this time.
8. Line a colander with cheesecloth and slowly pour the curds into the cloth. Let drain for a few minutes. Alternatively, the curd can be drained in a basket form (as in photo on page 144).
6. Using a long knife, cut the curds into ½-inch columns. With your blade at an angle, make a few horizontal cuts through the columns. Cover and let rest for 10 minutes to allow the curds to firm up a bit.
9. Gather the corners of the cloth into a knot and loop a shoelace or string through the knot. Hang the draining cheese over a pot and allow to drain for 18 hours at room temperature. If using a form, flip the wheel twice over the 18 hours.
10. Remove the cheese from the cloth and slice into 1-inch slabs. Stack in layers in a small container or ziplock bag, and cover all sides with the salt. Cover and place in the fridge.
11. Allow the cheese to lightly age and mellow for a few days. Turn the slabs daily to allow the collecting salty whey (brine) to coat each slice. You can age feta for months in the fridge as long as it is fully submerged in the brine and the air space is filled or covered to the level of the whey with plastic film. If air is touching the brine and/or cheese, harmless but unsightly molds will develop.
https://www.culturedfoodlife.com/store/product/prebio-plus/
Prebio Plus has three different strains of prebiotics, making it three times as effective as other prebiotics on the market today.
Organic Inulin (Blue Agave Leaf from Mexico)
Organic Acacia (Acacia Tree from Africa)
Fructooligosaccharides (Chicory Root from Chile)
If you're trying to get healthy, then probiotic foods can make a world of difference. Adding a prebiotic (which is food for your bacteria) will make the good bacteria grow like crazy and supercharge your probiotics.
Prebiotics are just as important as probiotics, and you should use them together. Prebiotics naturally reside in all kinds of fruits, vegetables, and some nuts & other foods. However, we found some of the strongest sources of prebiotics and placed them in an easy to use powder form.
Without prebiotics, your good bacteria could never grow like it's supposed to. Eating cultured probiotic foods adds colonies of bacteria to your gut. Adding prebiotics to your diet makes these colonies grow and grow, crowds out pathogens, and helps to reestablish the balance of good bacteria in strong numbers. Essentially, prebiotics serve as fertilizer for the bacteria in your colon. This can help strengthen your immune system to resist infections and viruses. It also helps to remove toxins and a host of other things that your bacteria is designed to do. But if you don't have the healthy strains of good bacteria from cultured foods, as well as the prebiotics to make them grow, your gut flora can't change into what it needs to be.
Prebio Plus is easy to use:
Add Prebio Plus - to any food or beverage, hot or cold.
Add Prebio Plus - to kefir or cultured veggies while they're culturing. You can even add it after they're done for an extra boost. Just a pinch will do!
Add Prebio Plus - to your kefir to make it super creamy. If your kefir has over-separated, Prebio Plus helps to make it creamy again.
Add Prebio Plus - to salad dressing or condiments such as kombucha mayo or kefir cheese for an added probiotic boost.
Add Prebio Plus - to your morning coffee or tea. Start your inner bacteria off to a running start at the beginning of the day!
Add Prebio Plus - to baked goods. Or just sprinkle it on top of salads or even toast & jam.
https://mycrashtestlife.com/2021/05/22/how-to-make-almost-sugar-free-kombucha/
STEP 3: SECOND FERMENTATION
The second fermentation step is where the real delicious taste of kombucha happens as well as the step to making Kombucha almost sugar-free. This is where you are free to play around with flavors that will not only make your homemade kombucha taste better than store-bought, but will give those good bacteria the power to kick it into high carbonation gear, bringing everything together into effervescent bliss.
In this step, some type of sugar (in this case, we are going to use inulin and allulose as are sweeteners) is added to flip top bottles that are going to store your kombucha. The inulin allows the healthy probiotic bacteria to continue to grow and to produce carbon dioxide which is what forms the fizz in store-bought kombucha. This is also where store-bought Kombucha gets loaded with sugar.
BUT NOT OUR HOMEMADE SUGAR-FREE KOMBUCHA!!!
By adding Inulin, you keep feeding your kombucha without adding any high glycemic sugar! You only need about 1 teaspoon to up to 1 tablespoon per liter flip-top jar.
IF YOU WANT STEP-BY-STEP DIRECTIONS FROM KOMBUCHA EXPERTS, CHECK OUT THE YOU BREW KOMBUCHA OR ACADAMY OF CULINARY NUTRITION.
Then, adding allulose to the brew brings out the sweeteness we all love!
Allulose can be added in any amount and can be varied depending on preferences.
Also known as D-psicose, allulose is technically classified as a rare sugar because it can naturally be found in just a few foods, such as kiwi, raisins and figs. It is chemically similar to fructose which is a type of natural sugar found in fruit.
However, unlike fructose or other types of sugar, your body doesn’t process it the same way and therefore has no effect on blood sugar and is therefore virtually calorie-free.
It has around 70% of the sweetness of regular table sugar therefore if you want to replace sugar with allulose, remember that for every 1 cup of sugar, you will use 1 ⅓ cup of allulose.
The BEST thing about allulose is that unlike other keto and low carb sweeteners, allulose does not crystalize when it cools making it great for certain desserts such as custards, pudding and marshmallows.
TIPS AND TRICKS IF YOU ARE GOING TO TRY TO MAKE YOUR OWN KOMBUCHA:
using glass or stainless steel bottle containers.
Keep everything sanitary, including the equipment and your hands.
make sure you use caffeinated tea and NOT decaf
use only black tea for making the SCOBY but then feel free to use green tea or any other tea for the 1st and 2nd fermentation
the ratio for making a SCOBY is: 7 cups of water: 1 cup of Store-bough Kombucha starter: 4 bags of caffeinated tea: ½ cup sugar
Add only about 1 teaspoon to 1 tablespoon of Inulin to the second fermentation process along with additional allulose depending on how sweet you want your Kombucha to taste.
If you use higher sugar fruit such as pineapple, mango, peach or watermelon juice be extra cautious and burp the bottles or check carbonation frequently as the bottles can build up a lot of pressure
Once you have left the bottles at room temperature for 3-10 days after the second fermentation, place the jars in the fridge and enjoy!
If you want your kombucha to be even more carbonated, use a SodaStream machine
You will know if you have a good and strong probiotic-packed Kombucha if you start to see a new SCOBY form in your flip-top bottles after the second fermentation. Feel free to eat that SCOBY as it is EXTREMELY healthy!
https://www.fairment.de/wissen/wasserkefir/wasserkefir-pause/
https://www.fairment.de/wissen/ingwerbier-ginger-beer/
https://www.youtube.com/watch?v=rZpTILNRRlY
https://www.fairment.de/rezepte-artikel/ginger-bug-limonaden/